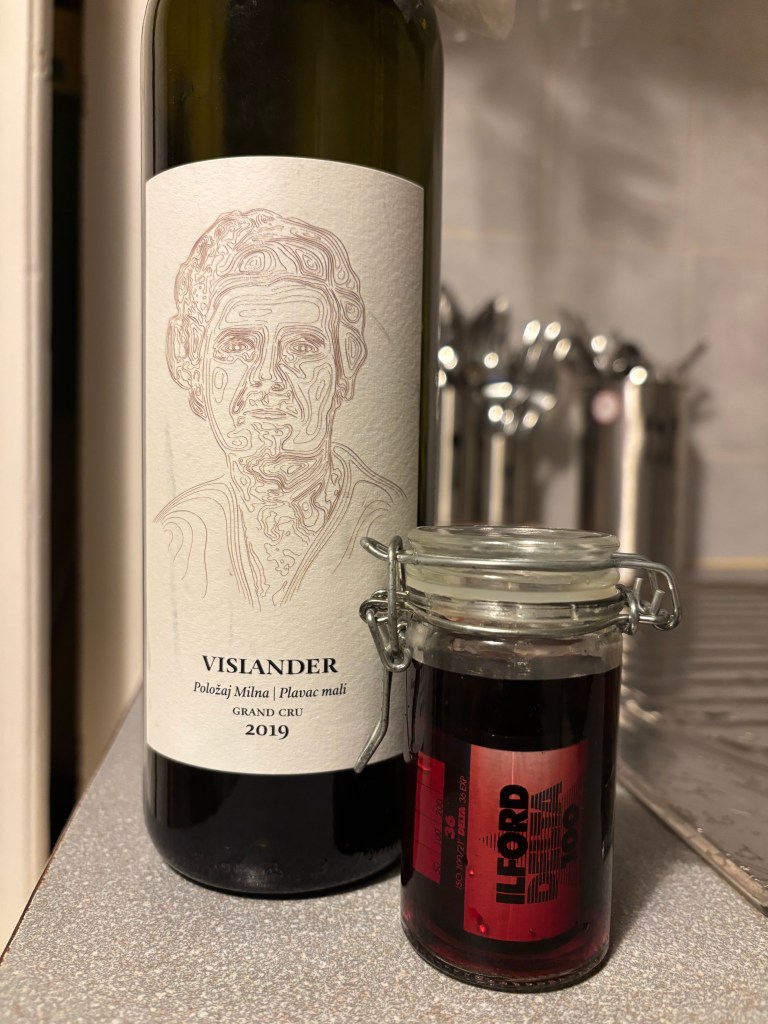
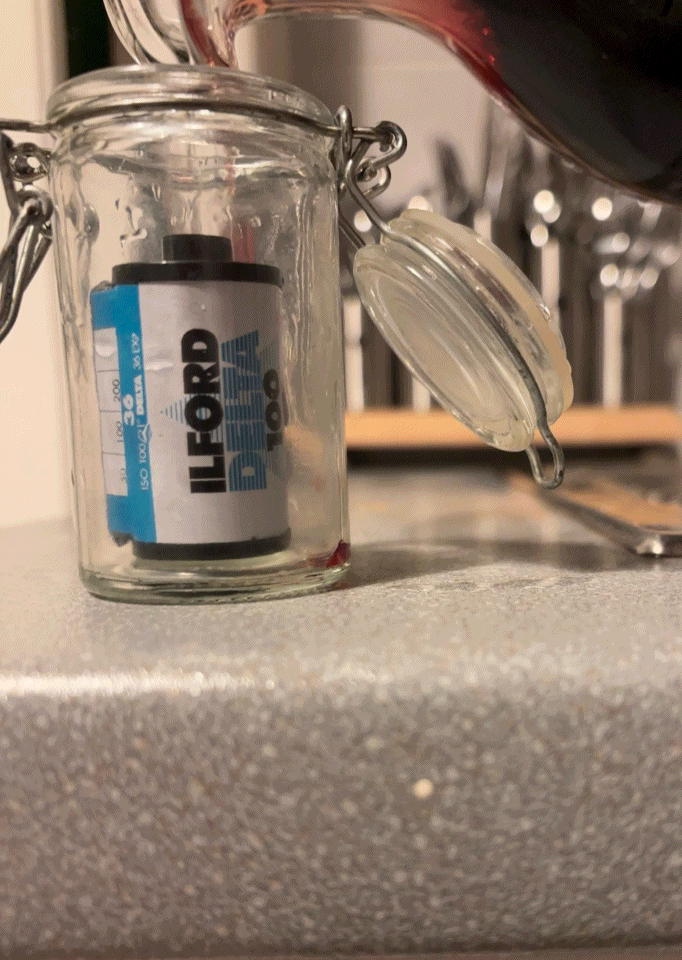
I chose a dark-ish red wine and let the film bathe in it for twenty hours or so at room temperature (22-23°C). The film was fully submerged. The Internet tells me that the alcohol (13-14°) is likely to degrade the emulsion and likely produce explosion-pattern dark spots. The wine will likely stain the film so dots and patches may appear.
Souping before exposing yields moderate effects. Add to this that it’s a BW film (no colour shifts, etc.) and that souping in wine is rather tame, underwhelming results are to be expected. Shall prepare one with pickle juice, toothpaste and isopropyl alcohol.
Needs to dry for at least 10 days.
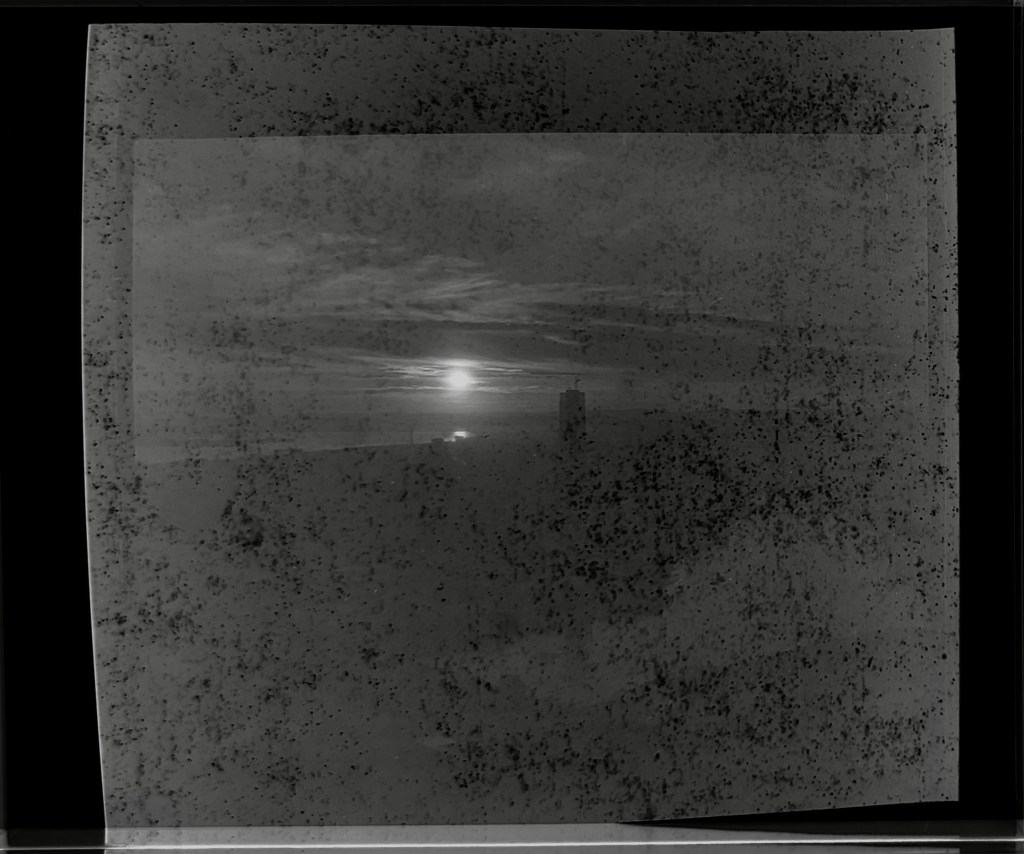
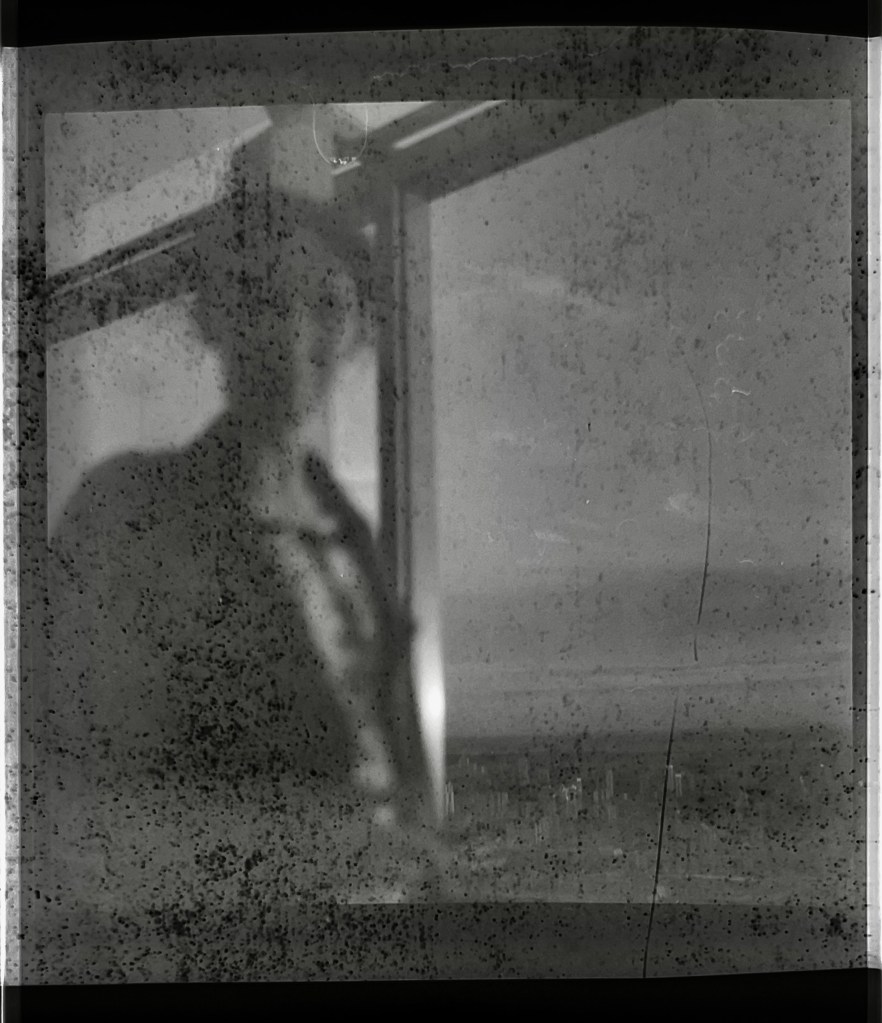
UPDATE – I fucked up. It wasn’t at all dry after 10 days and it got stuck at frame no. 18 in the Lomo Apparat. Then I fucked up again by developing it together with a low ISO Ortho film in Caffenol of all things – the T structure of the Ilford delta can, in fact be developed in caffenol but in different concentrations of its ingredients. No usable frames.
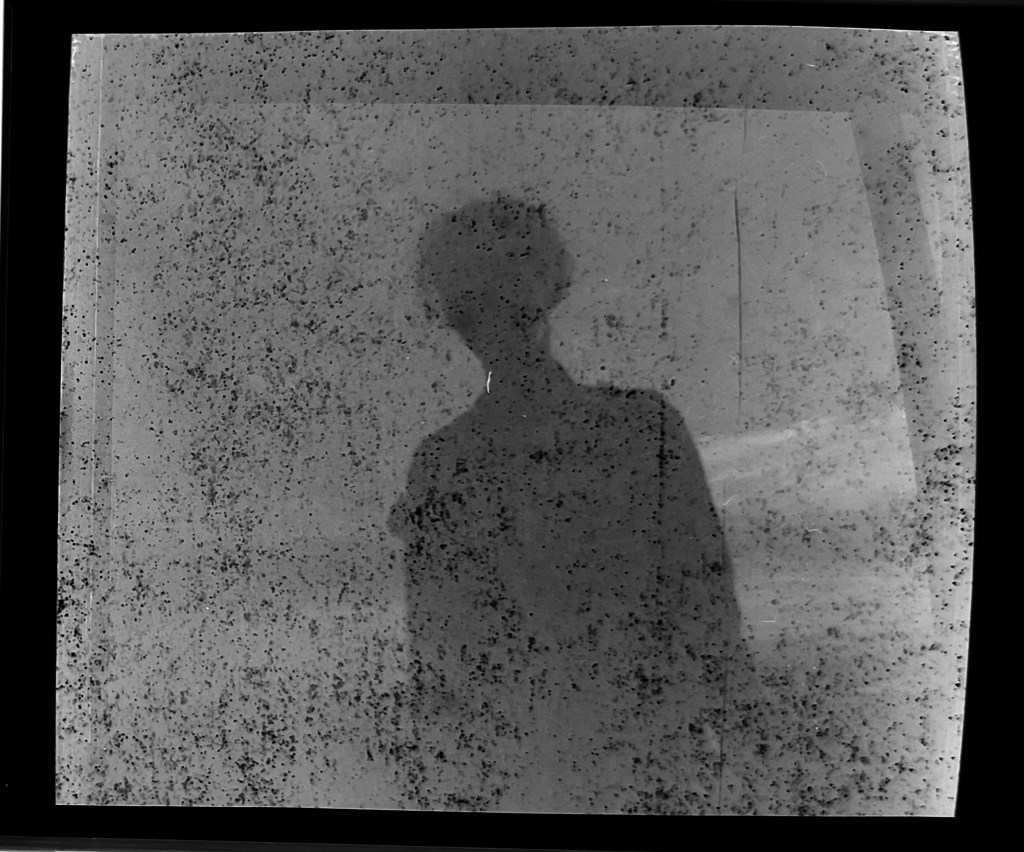
This was bought in Yekaterinburg together with a beautiful Lubitel TLR in the summer of 2014. I’ve shot a roll the same year and had it developed at the shop – only a few pictures are actually visible on the negative and the emulsion seems to have degraded significantly.
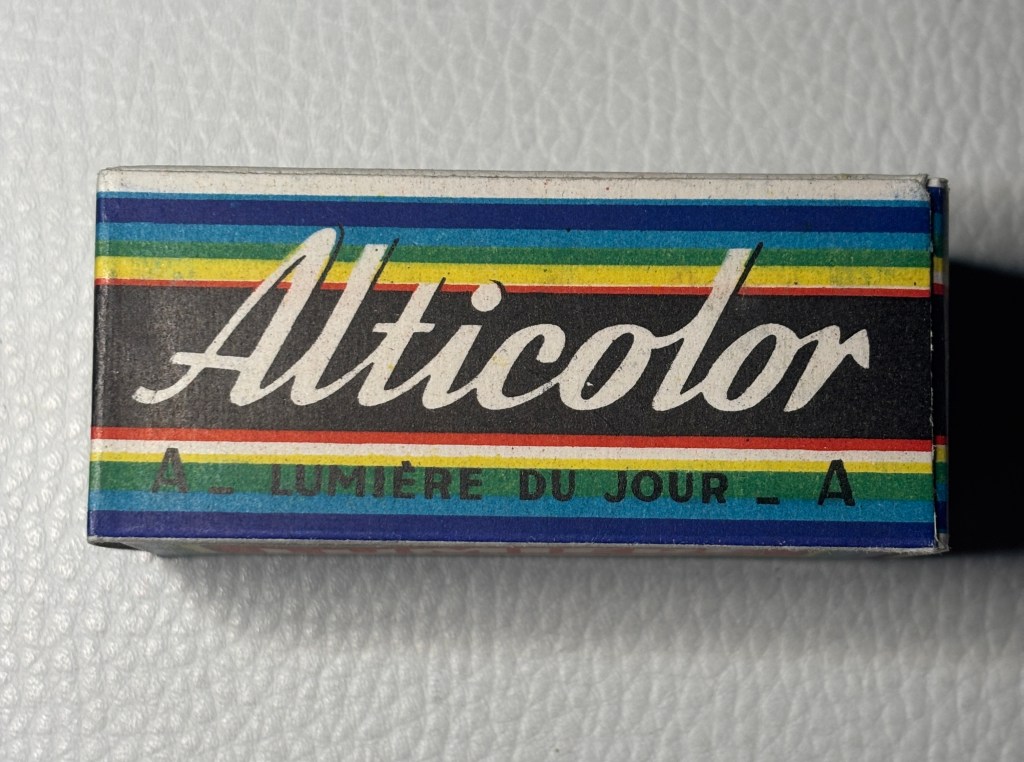
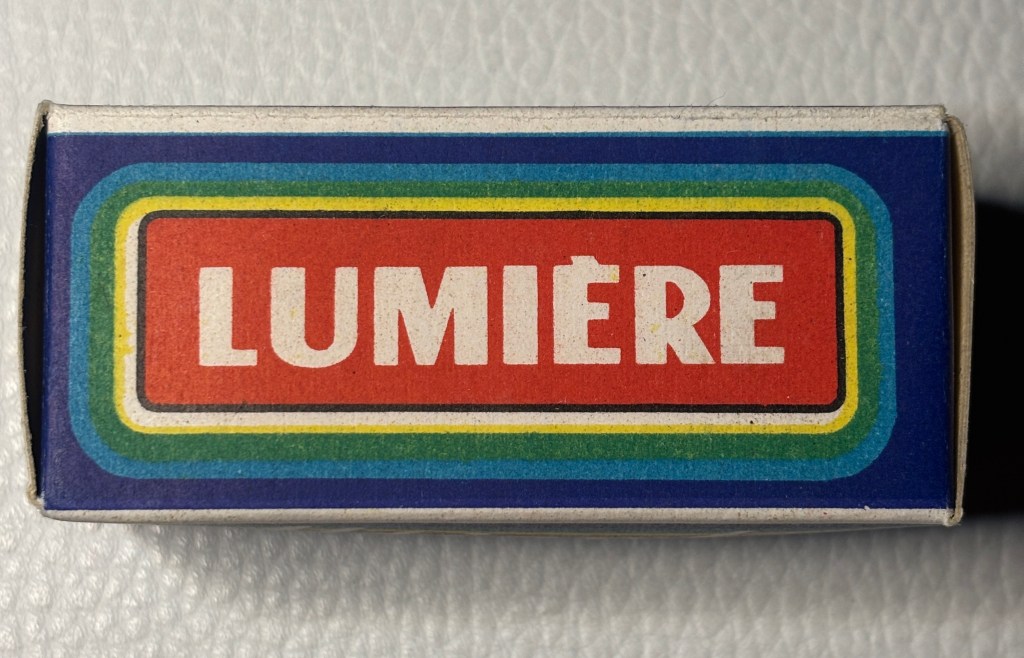
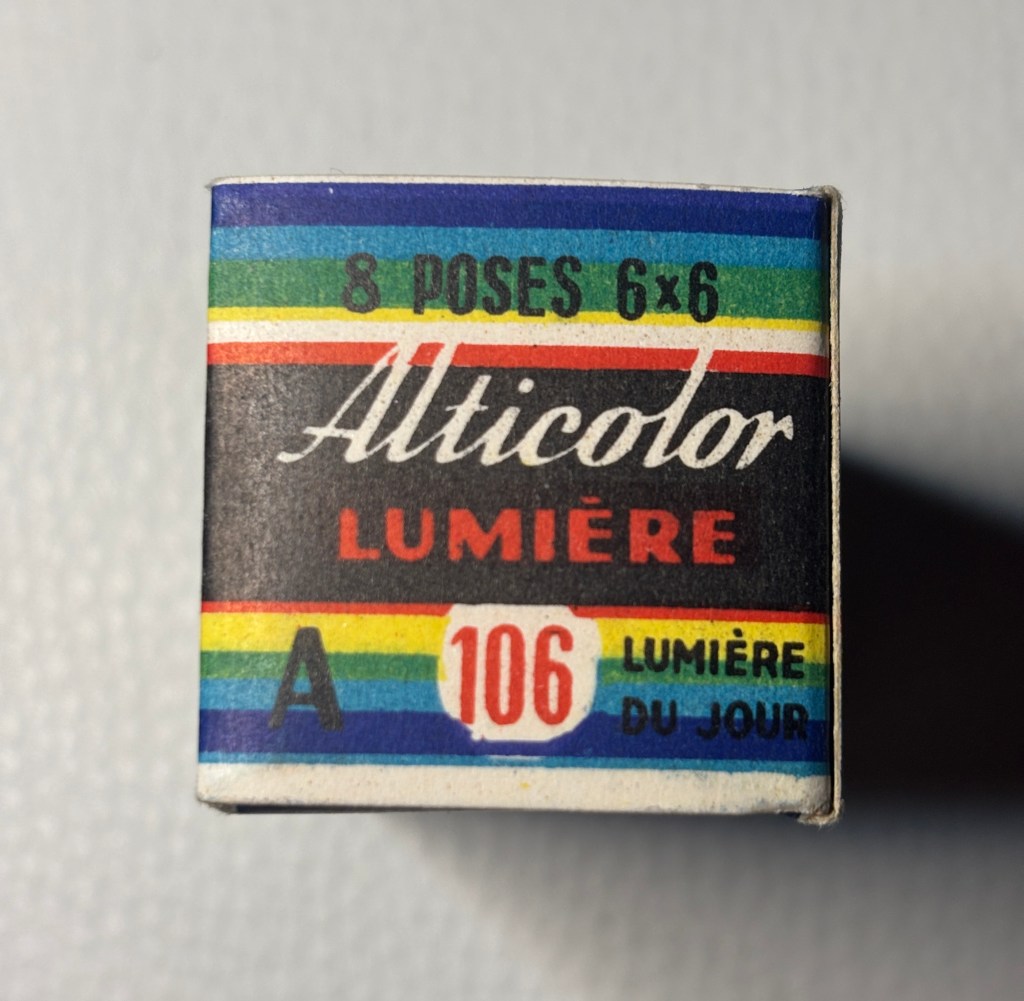
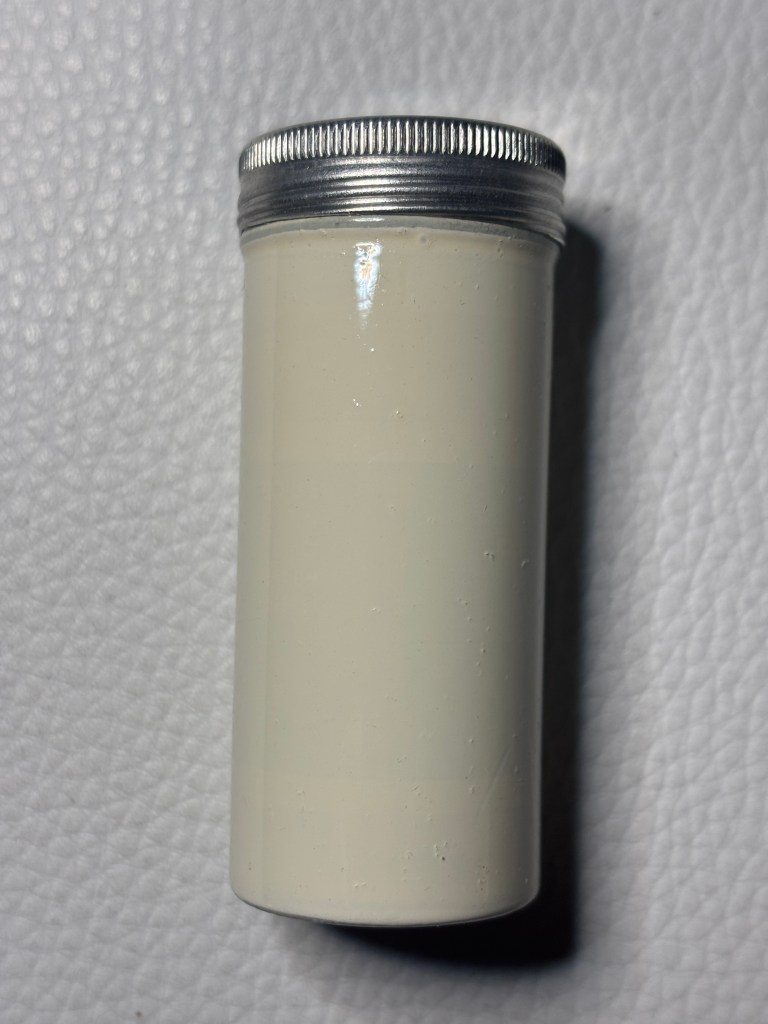
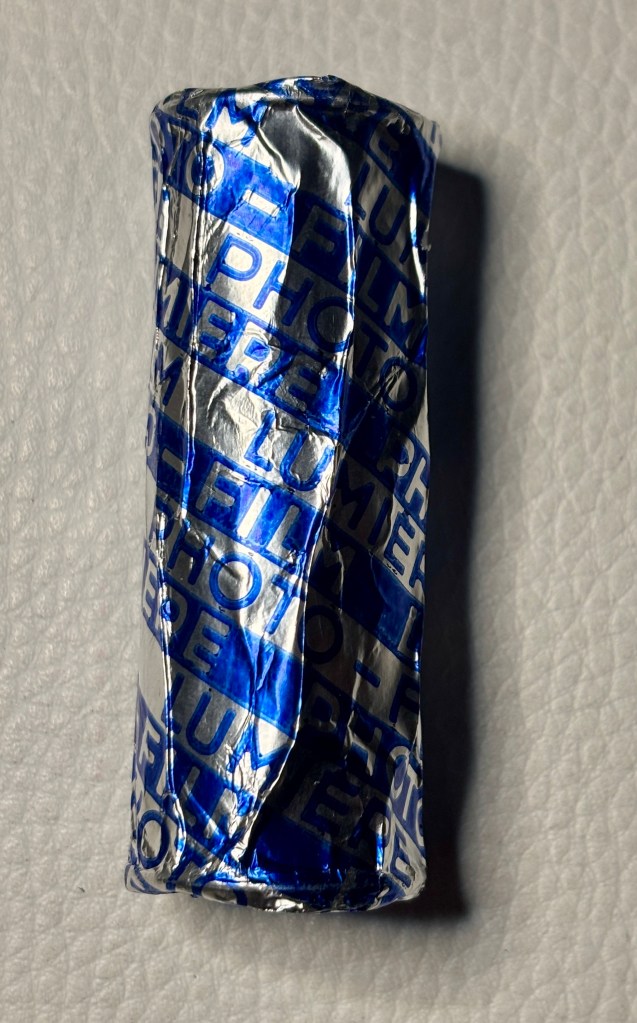
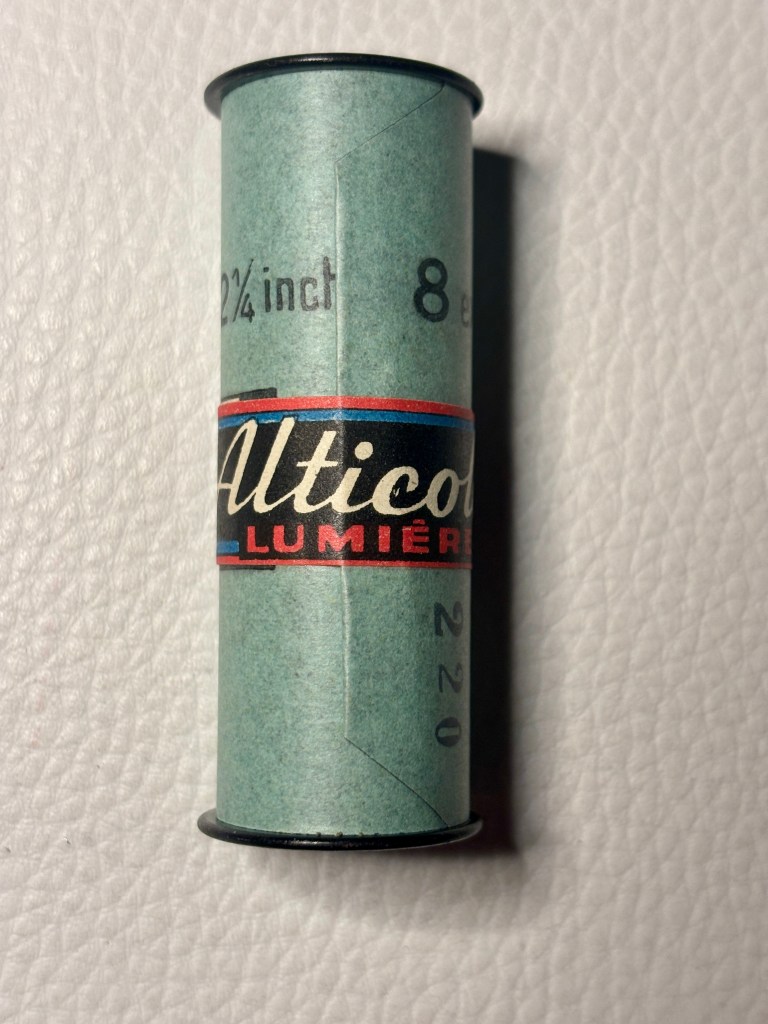
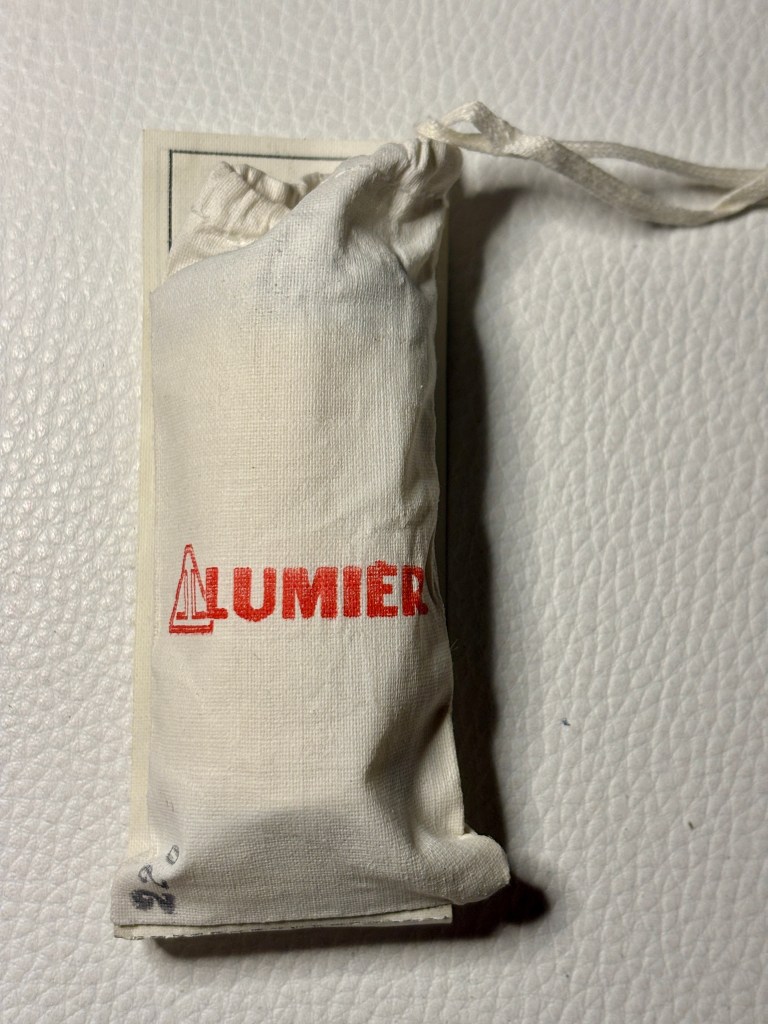
I’ve bought the film online, from a shop in Lyon; boy oh boy was this a surprise. This is pristine, brand new, sealed and unopened film manufactured by the Lumière company in Lyon, France in the ‘50s. It’s 120mm film for 8 6×6 shots. Colour, nominal ISO 10.
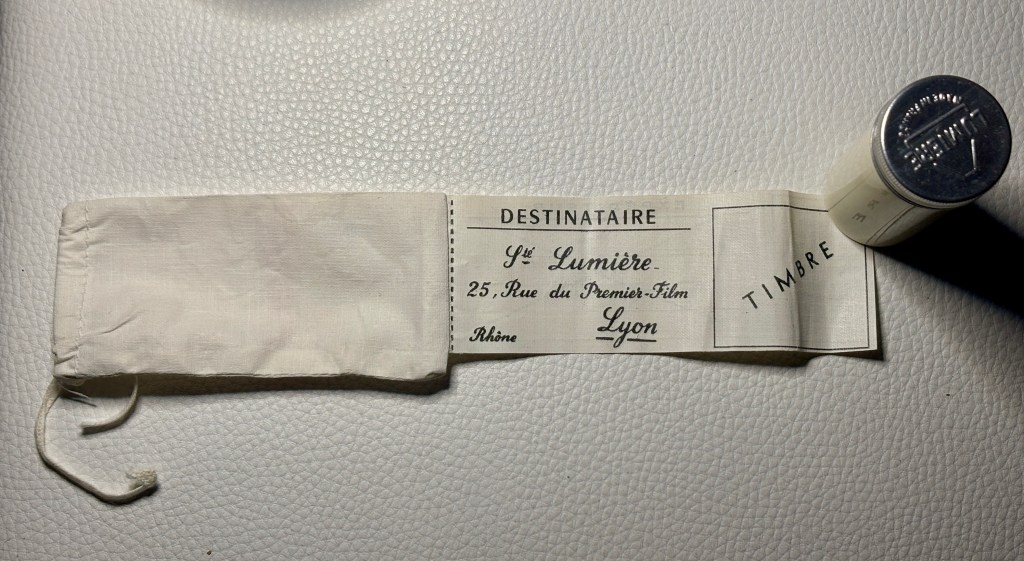
The cardboard box contains a tin tube that holds the film, which is wrapped in aluminium foil. There is also a cotton bag that is used to send the film in and have it developed (the cost was included in the price of the film, according to the information sheet inside).
This film uses starch to create a RGB mask: individual starch grains are collected from potatoes, then dyed in red, green and blue, and scattered on the surface of the film. Precisely like the RGB matrix that is applied in fromt of the digital sensor of modern cameras.
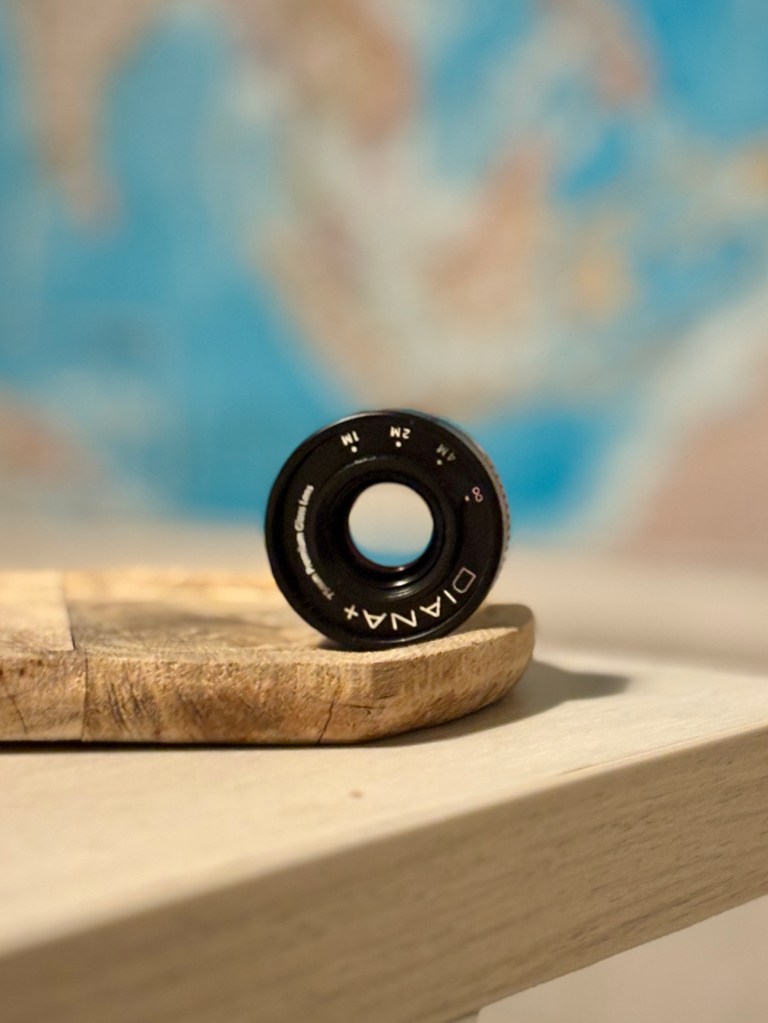
One can upgrade the plastic lens with the « Premium glass lens » – or you can go the extreme lo-fi way and unscrew the lens to shoot through the embedded cca f/130 pinhole (anywhere between f/126 and 1/150 according to the Internet).
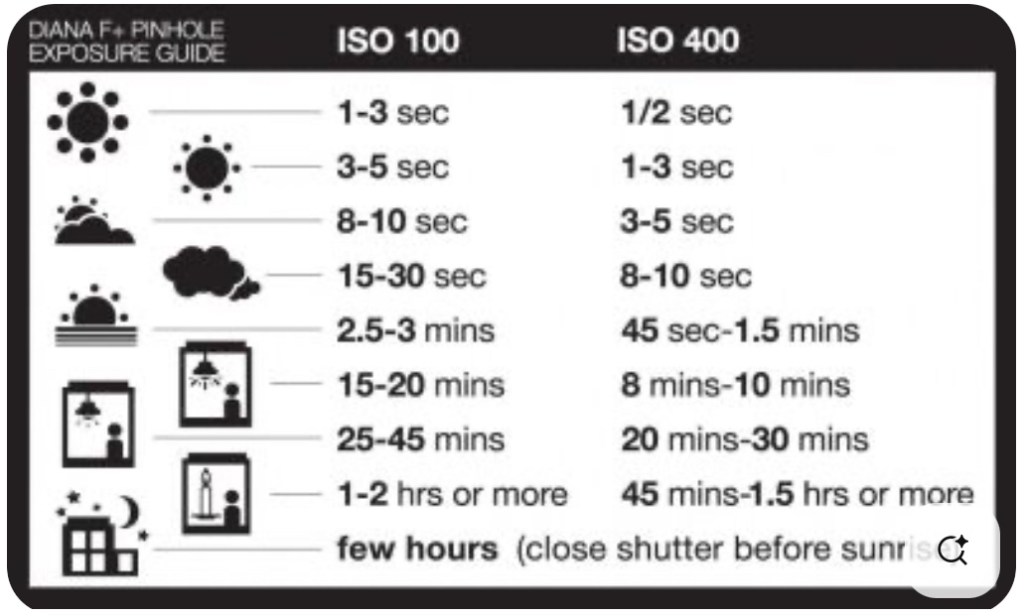
And a handy exposure guide:
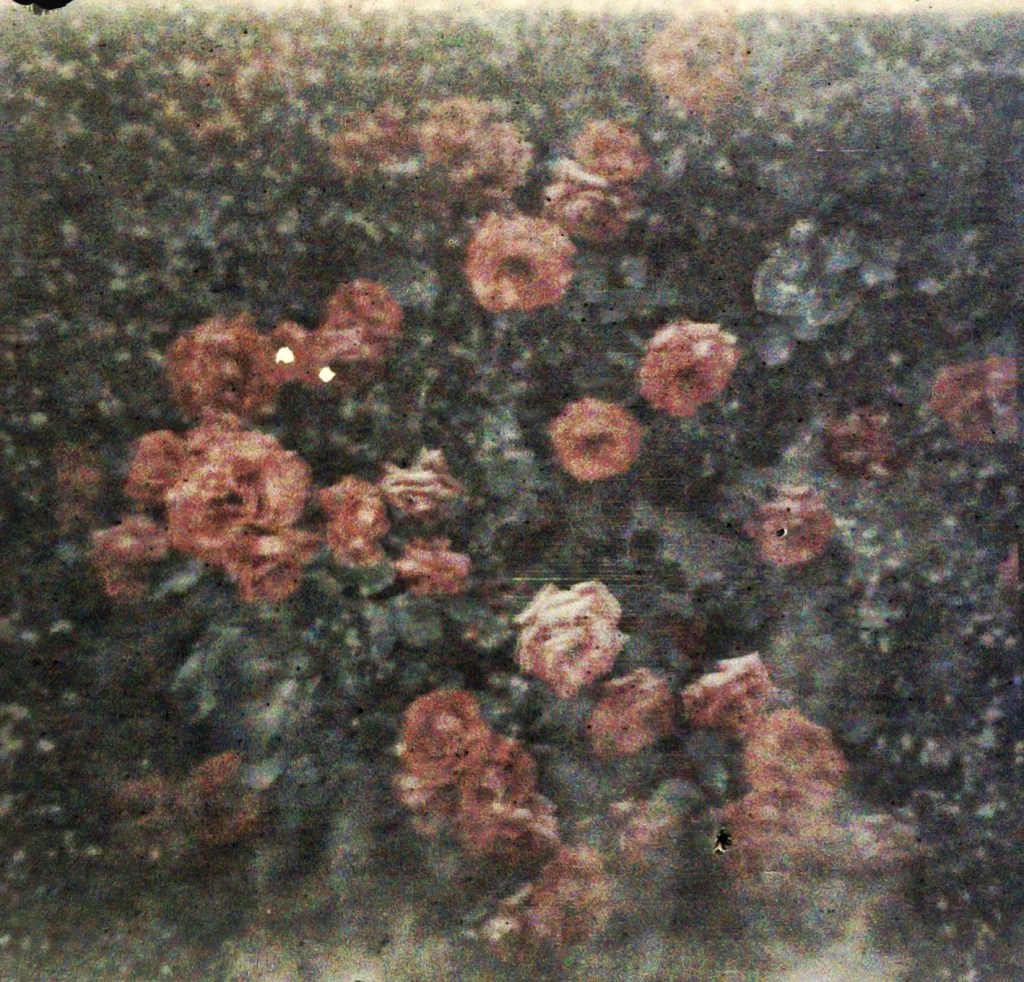
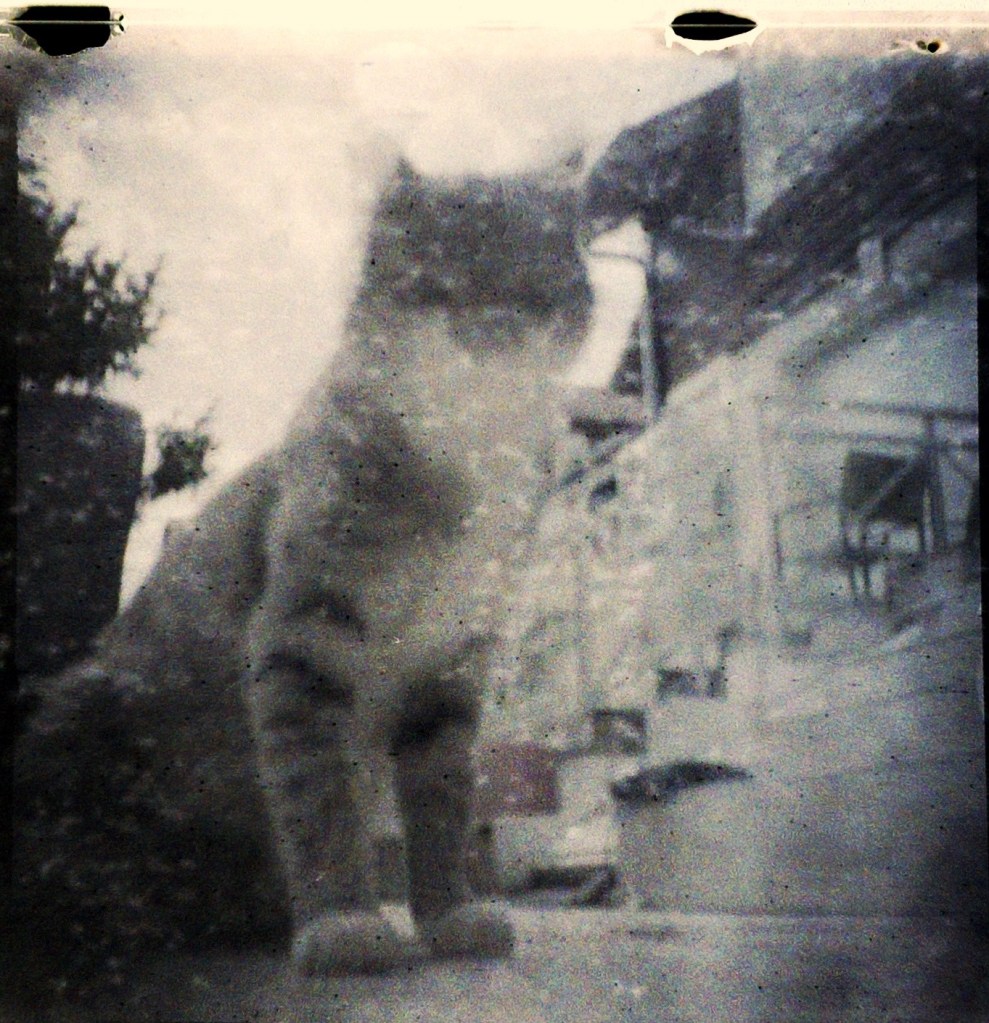
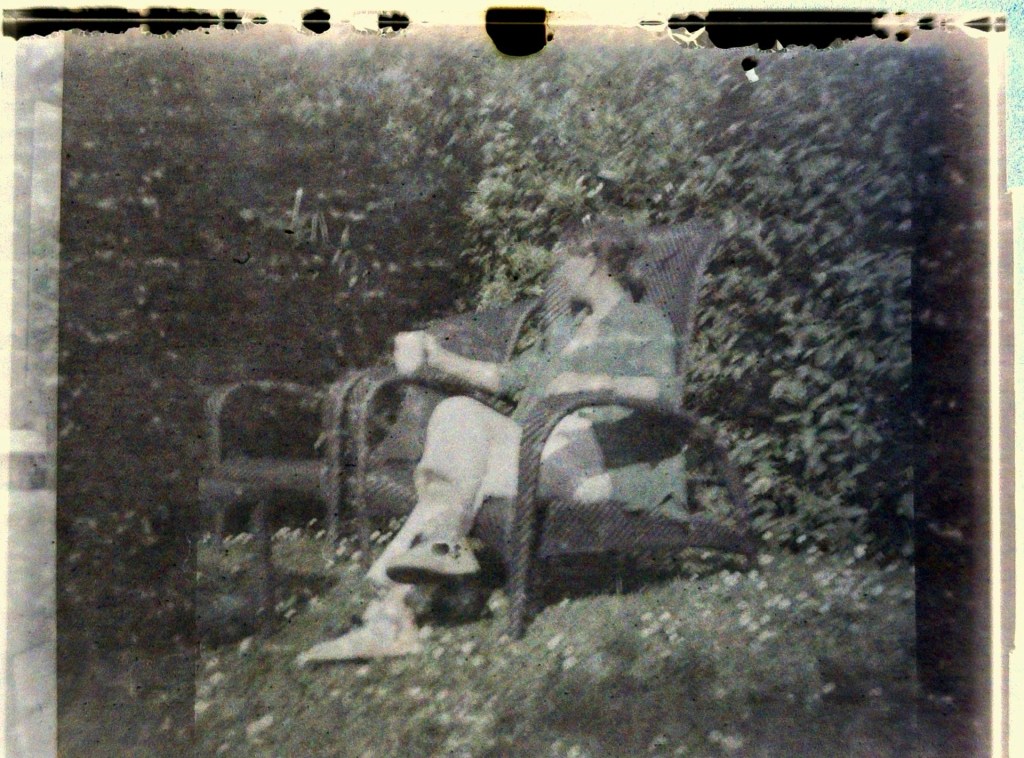
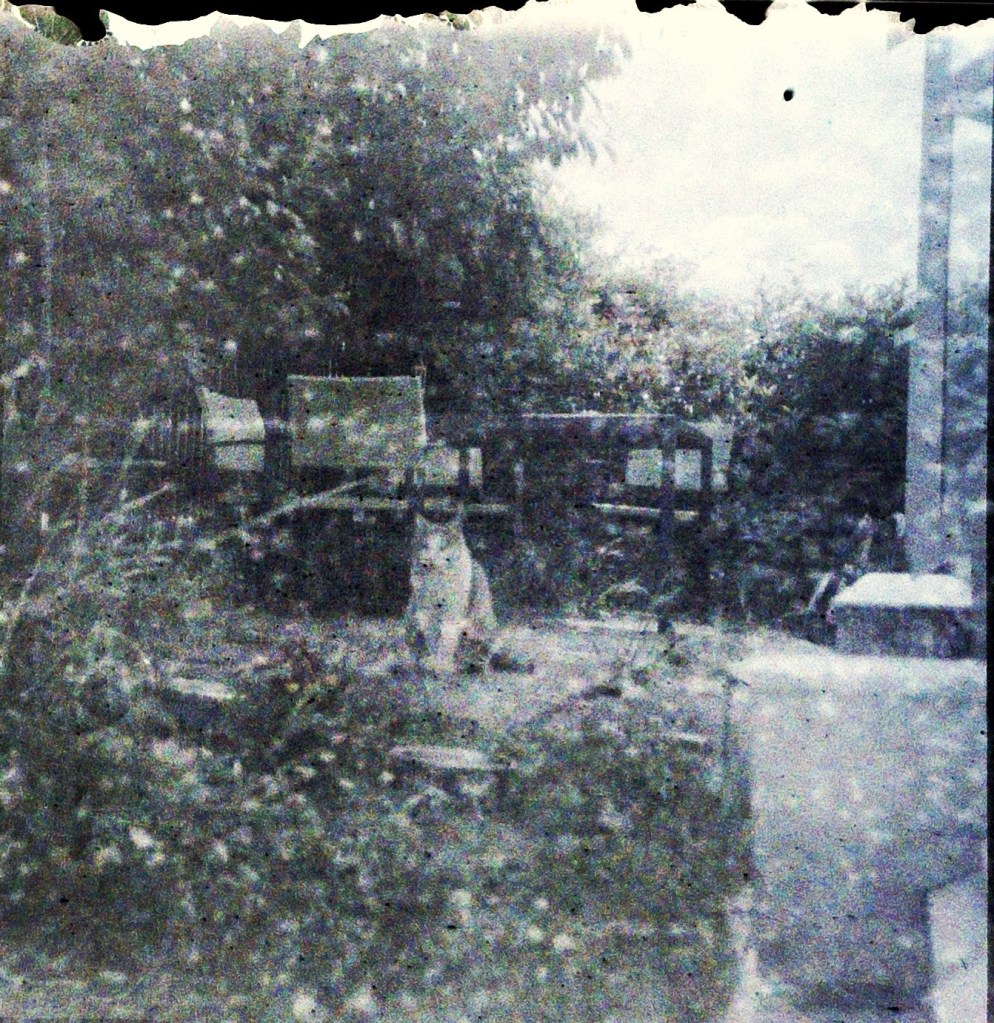
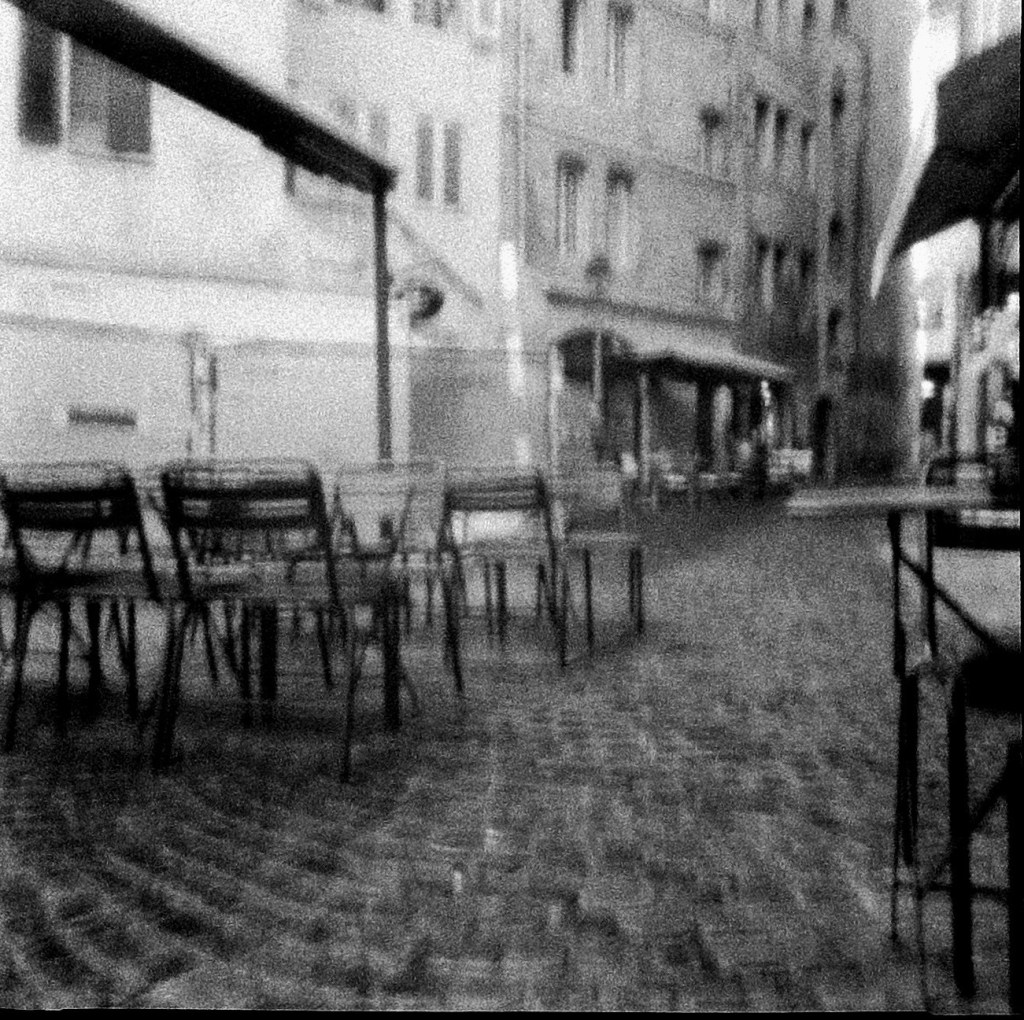
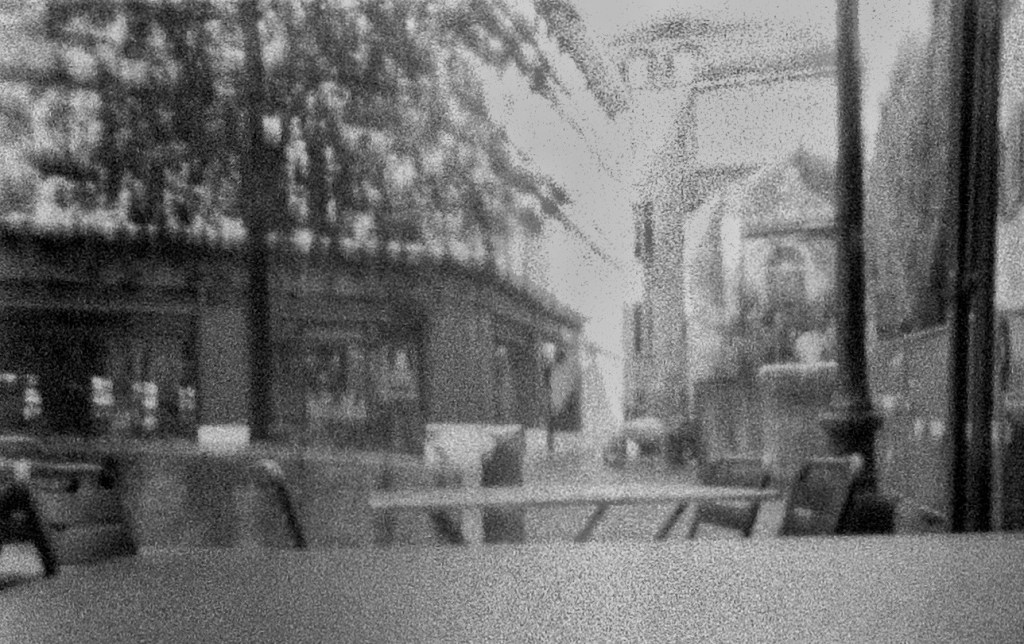
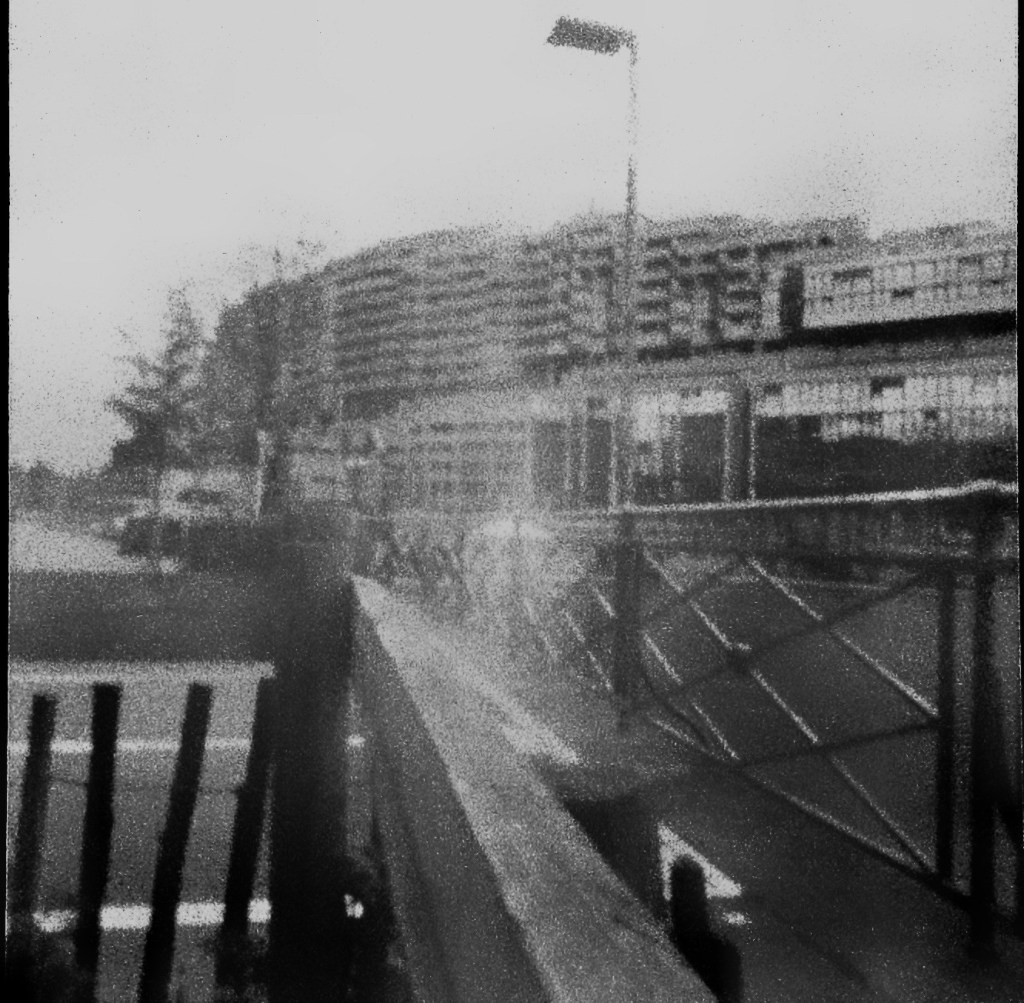
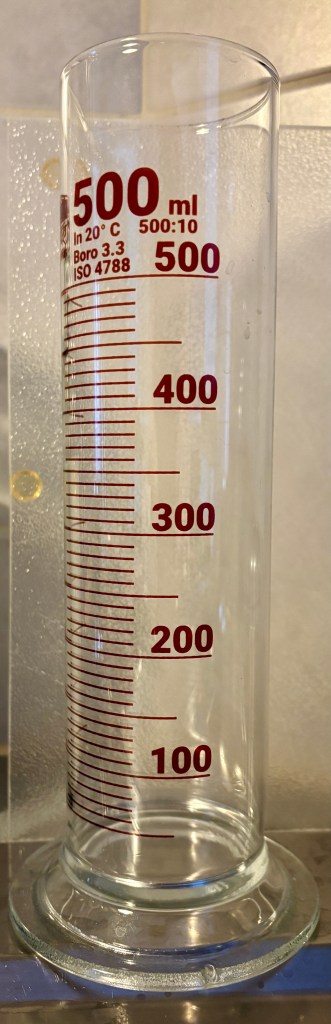
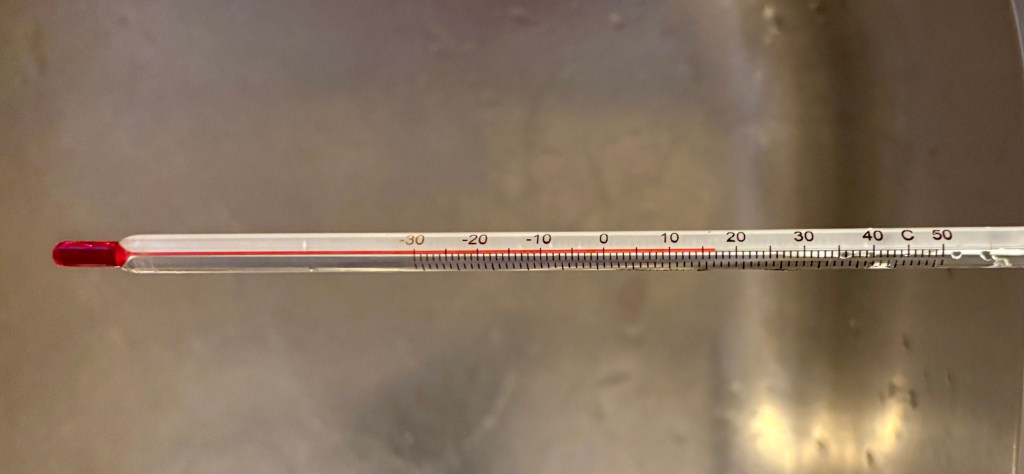
The first set of photos are… really grainy, despite being shot on Ilford Delta 100, medium format. They were shot on an overcast day with exposures ranging from 30″ to 1’. Developed for 5’ in Rodinal 3 (10% dilution) @ cca 20°C, Ilford stopper (5%) for 1’, Ilford rapid fixer (20%) for 3 minutes or so. Washed for 5’ under running tap water, final 1’ bath in a 1% isopropyl solution.
Interestingly, a (significantly) longer exposure – about 10 minutes or so – yielded much less grainy results. More tests are here needed.
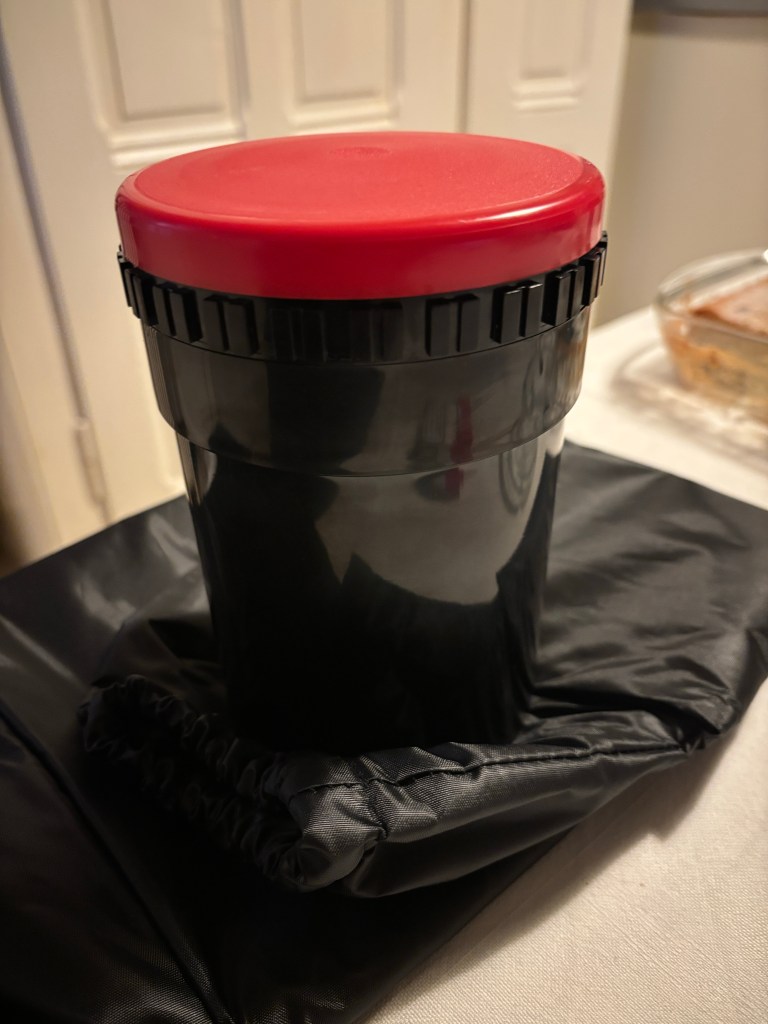
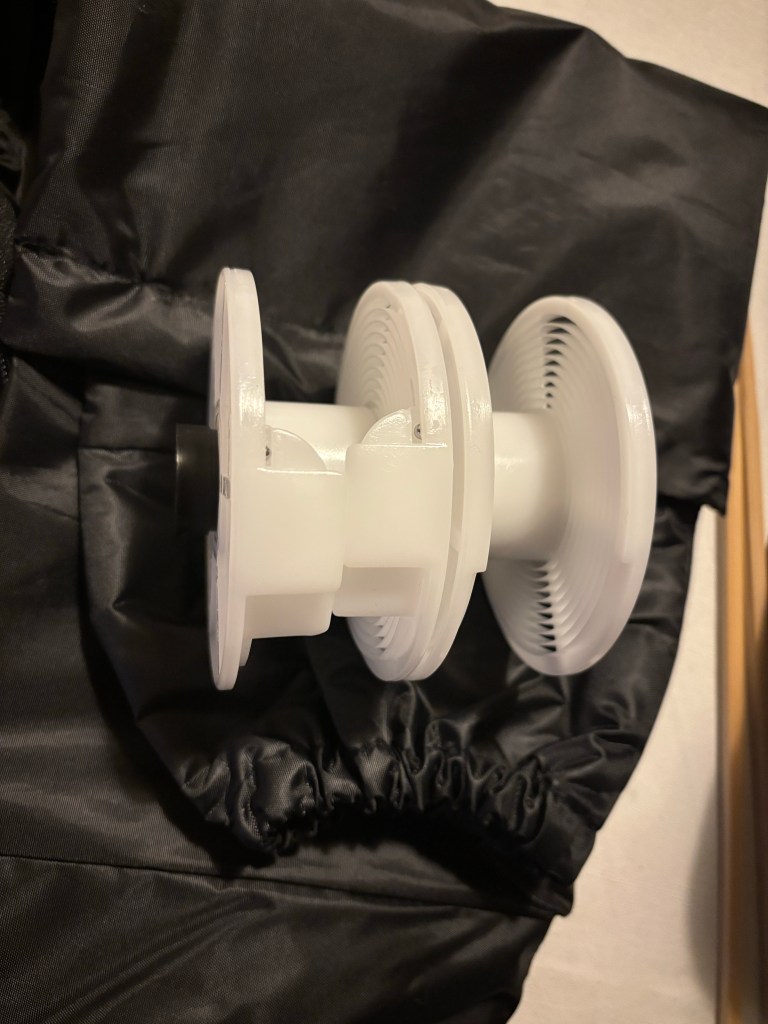
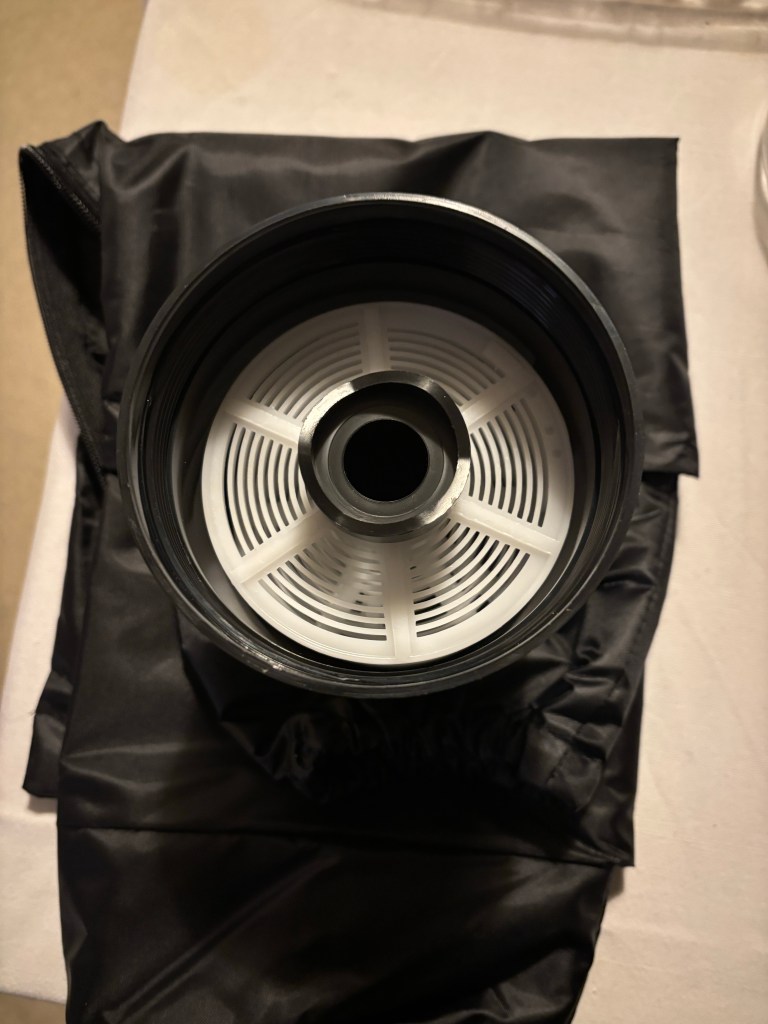
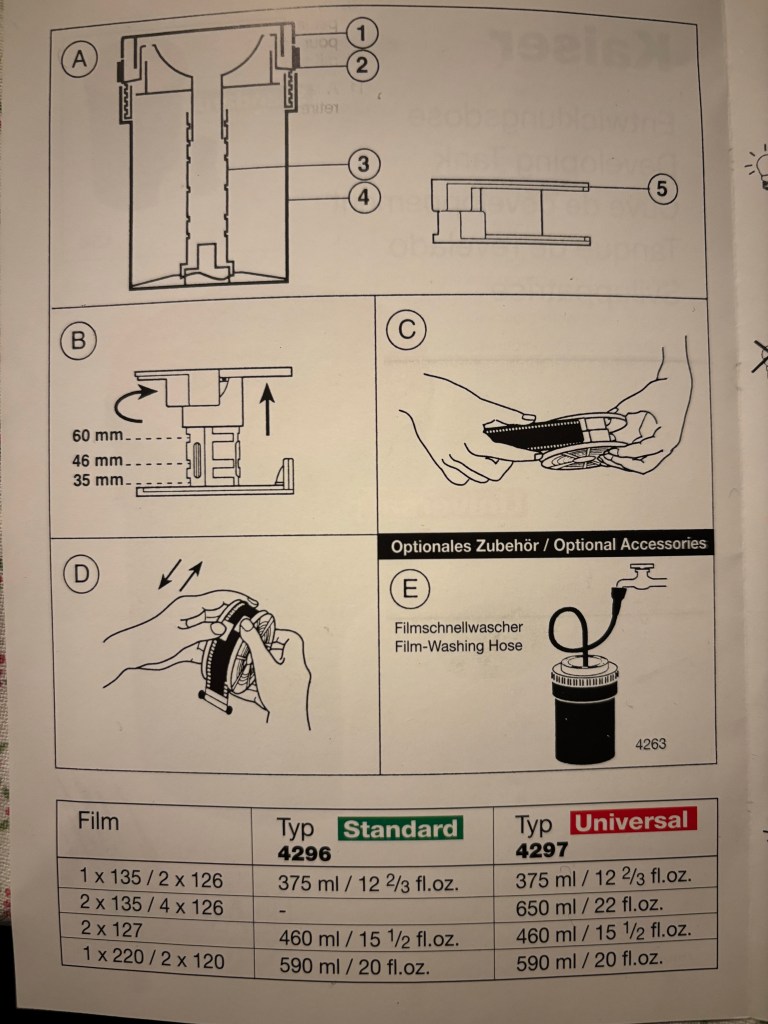
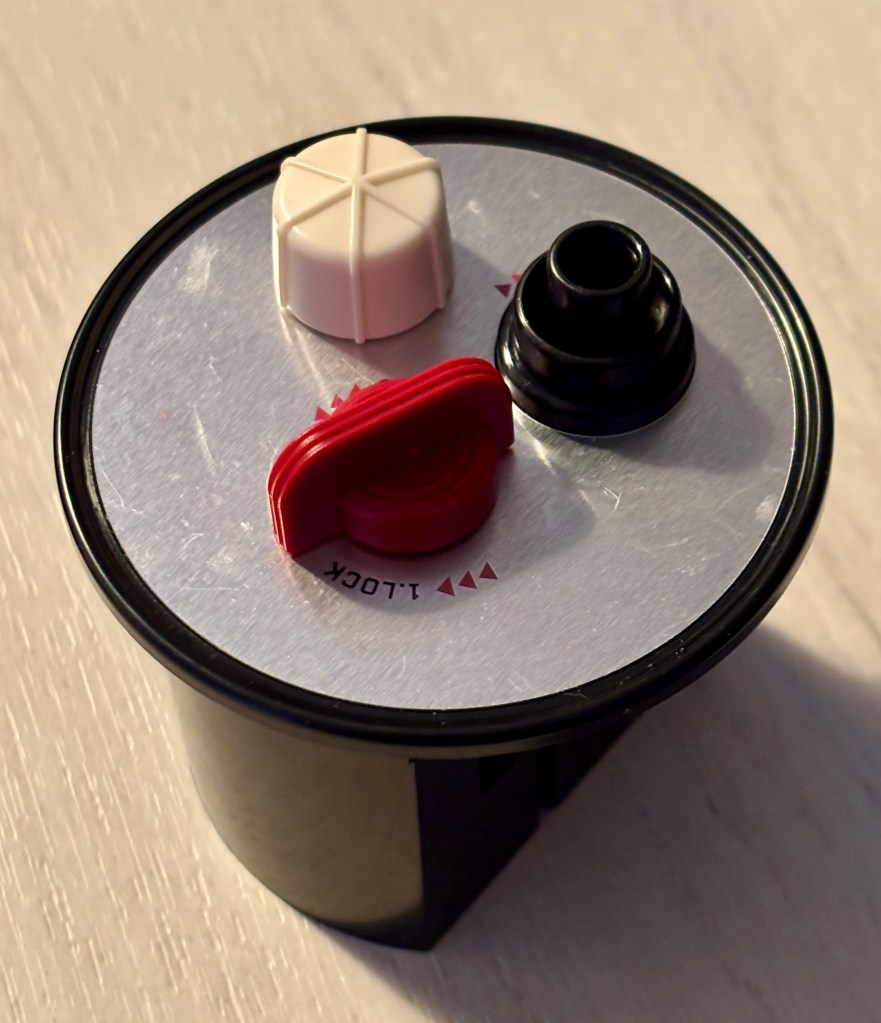
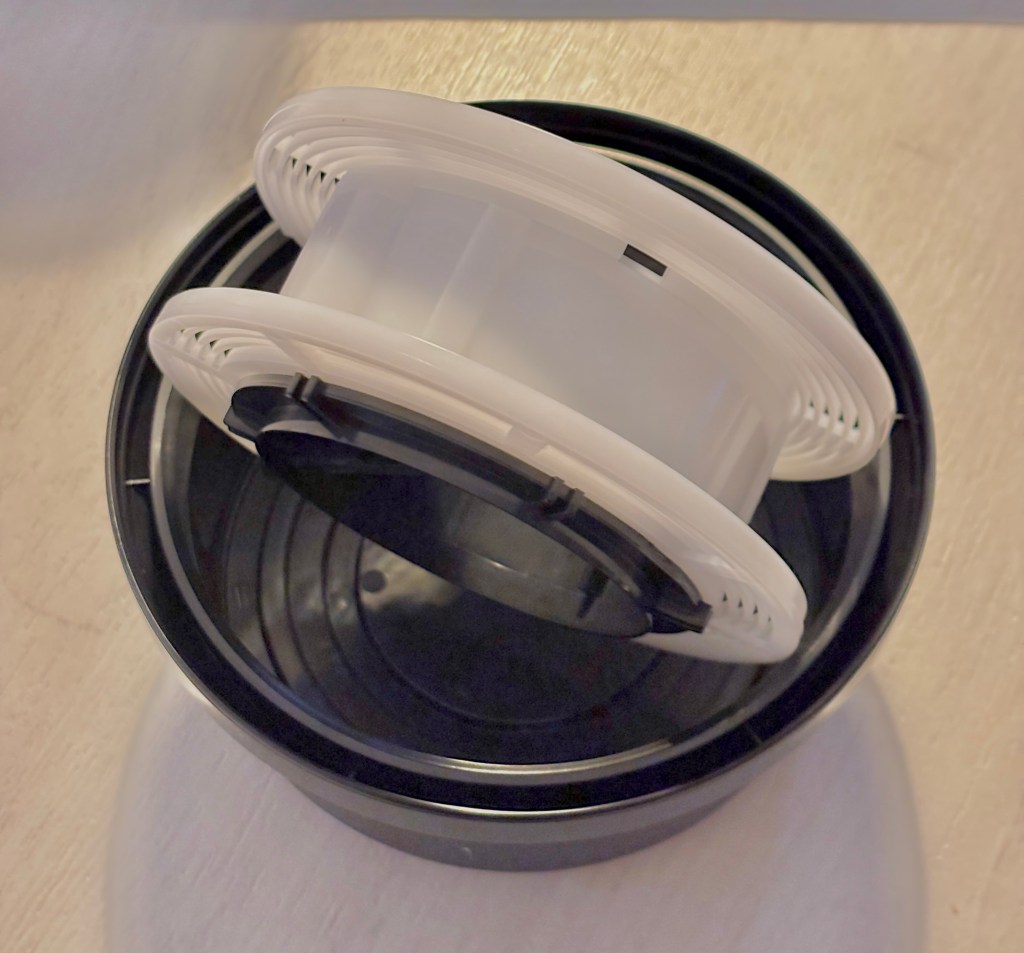
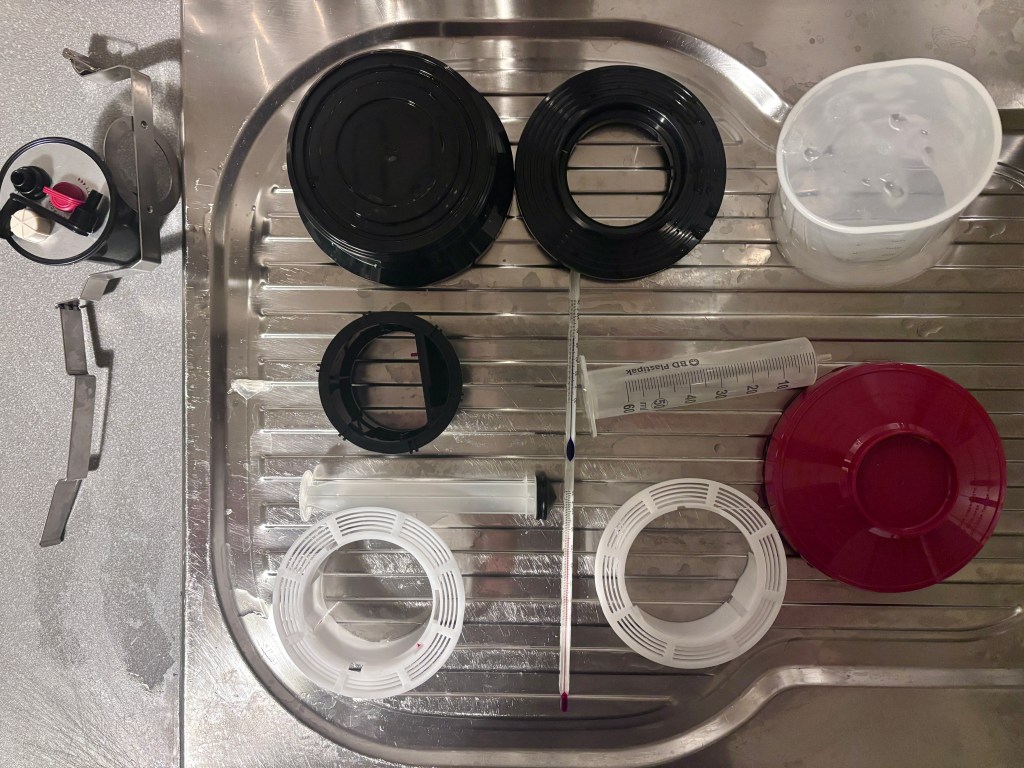
The König Universal Development Tank is a device that removes the need for a darkroom when developing film. It consists of two adjustable rolls (35, 46 and 60mm), of a central axis on which the rolls are placed and all this goes into the development tank that is sealed with a screw-on cap that allows for liquid exchange and the sealing cap that keeps it all in when agitating by inversion. One needs to buy a changing bag in which the film is transferred from the cassette to the rolls.
The changing bag is less fiddly than expected and film can easily be transferred to the rolls, 120 included.
Liquid levels should be respected so that the rolls are fully imersed.
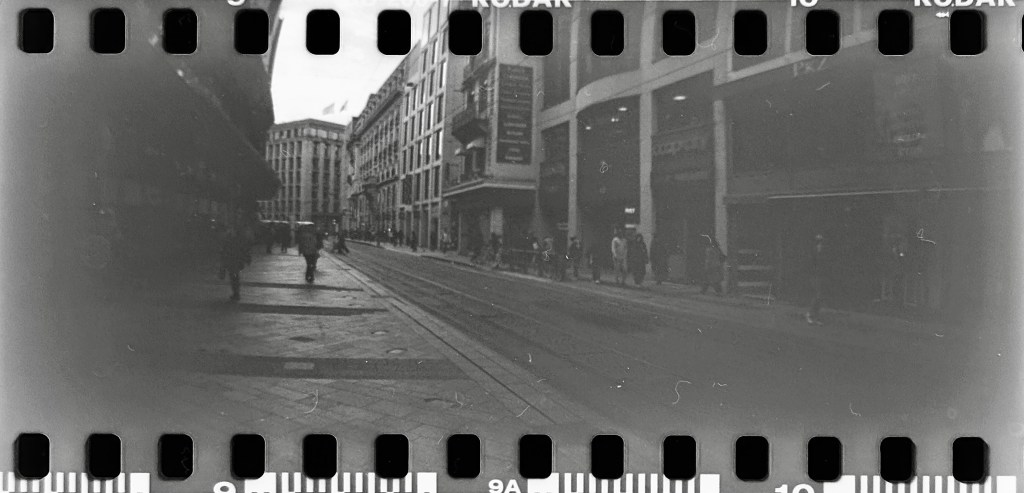
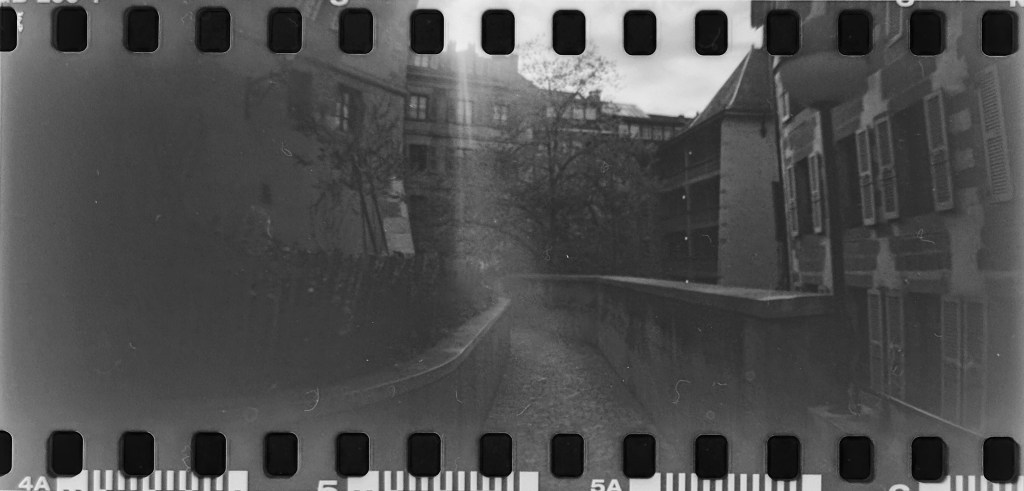
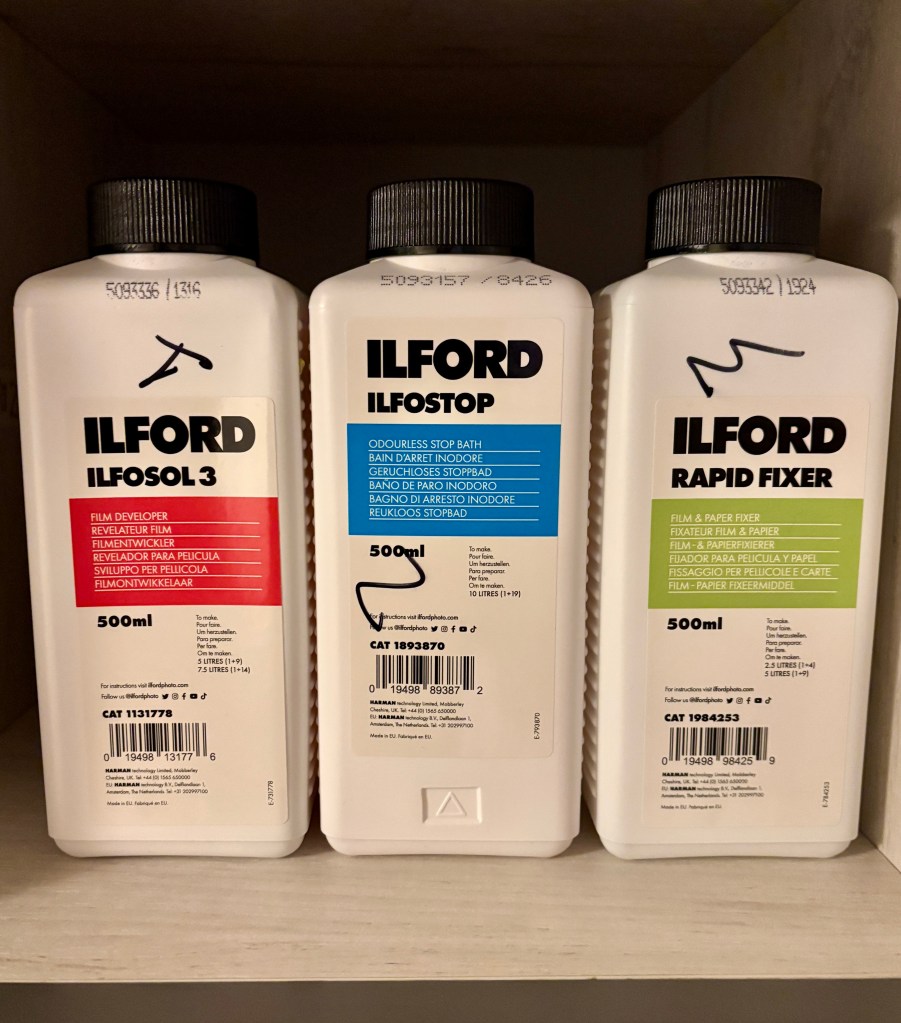
After shooting a short roll of Kodak Gold 200 with the SprocketRocket I developed it in Ilfosol 3 for 10 minutes at 30 C, then stopper for one minute and 5 minutes of fixer. Washed the film thoroughly with tap water for 5 minutes or so.
I used the Daylight development tank (agitation every 2 minutes) and the Digitaliza to scan the negatives.
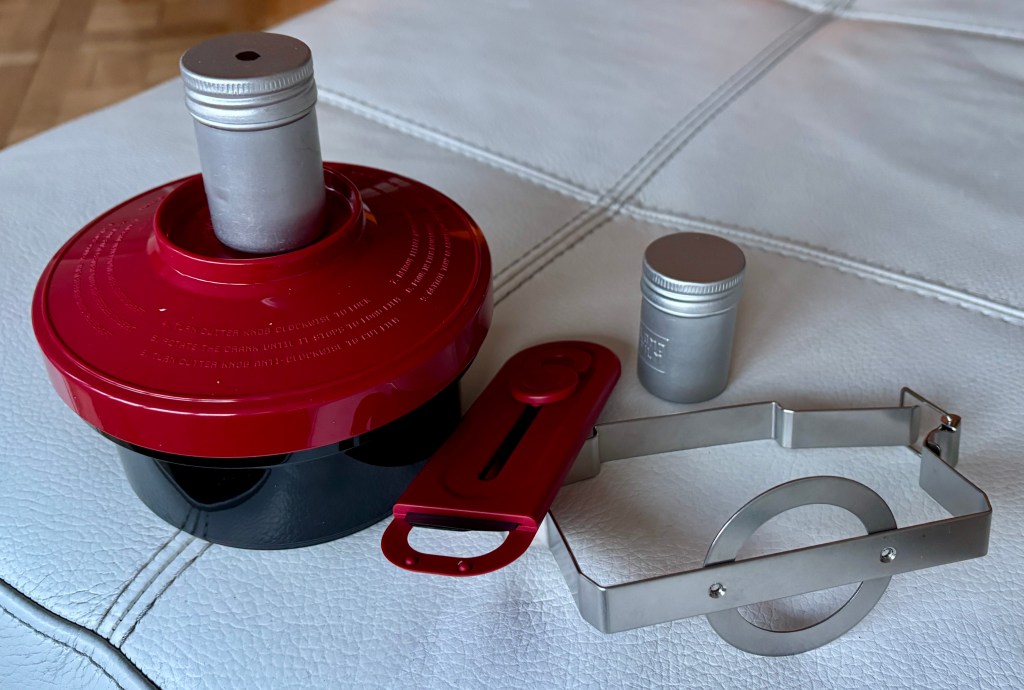
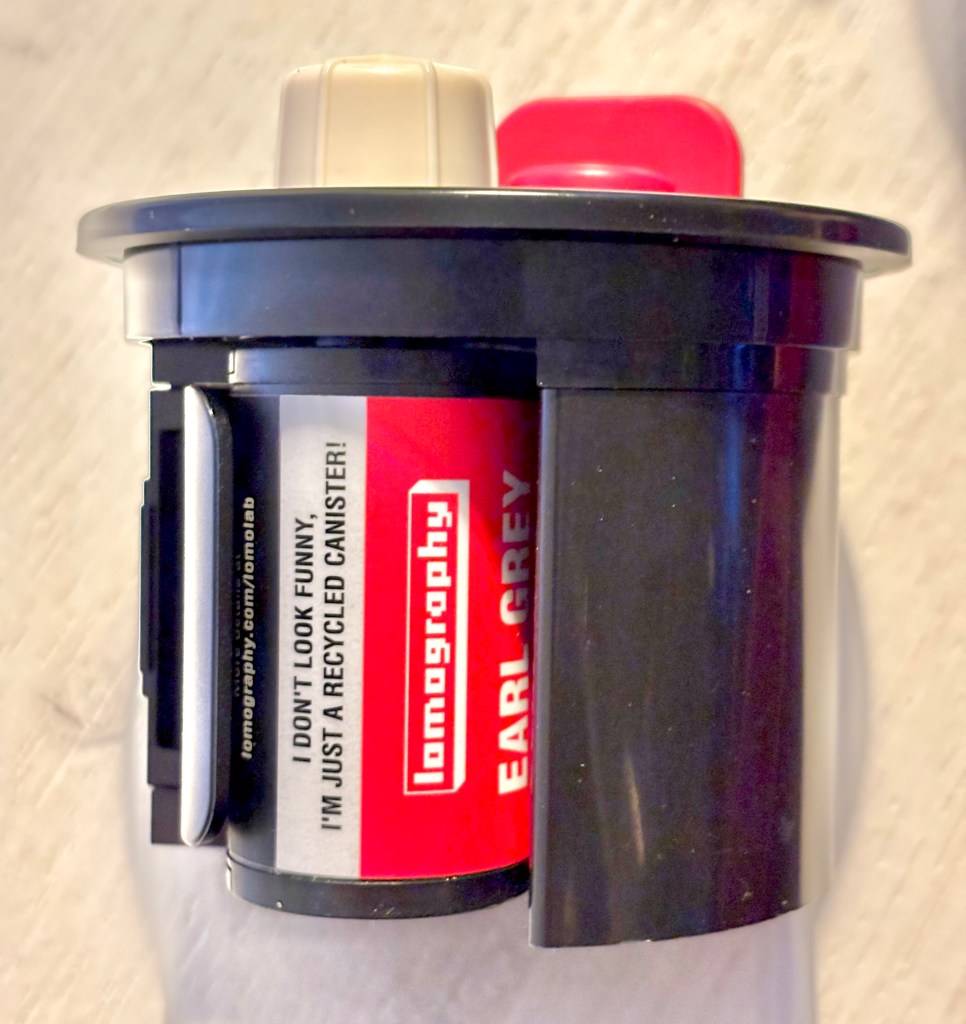
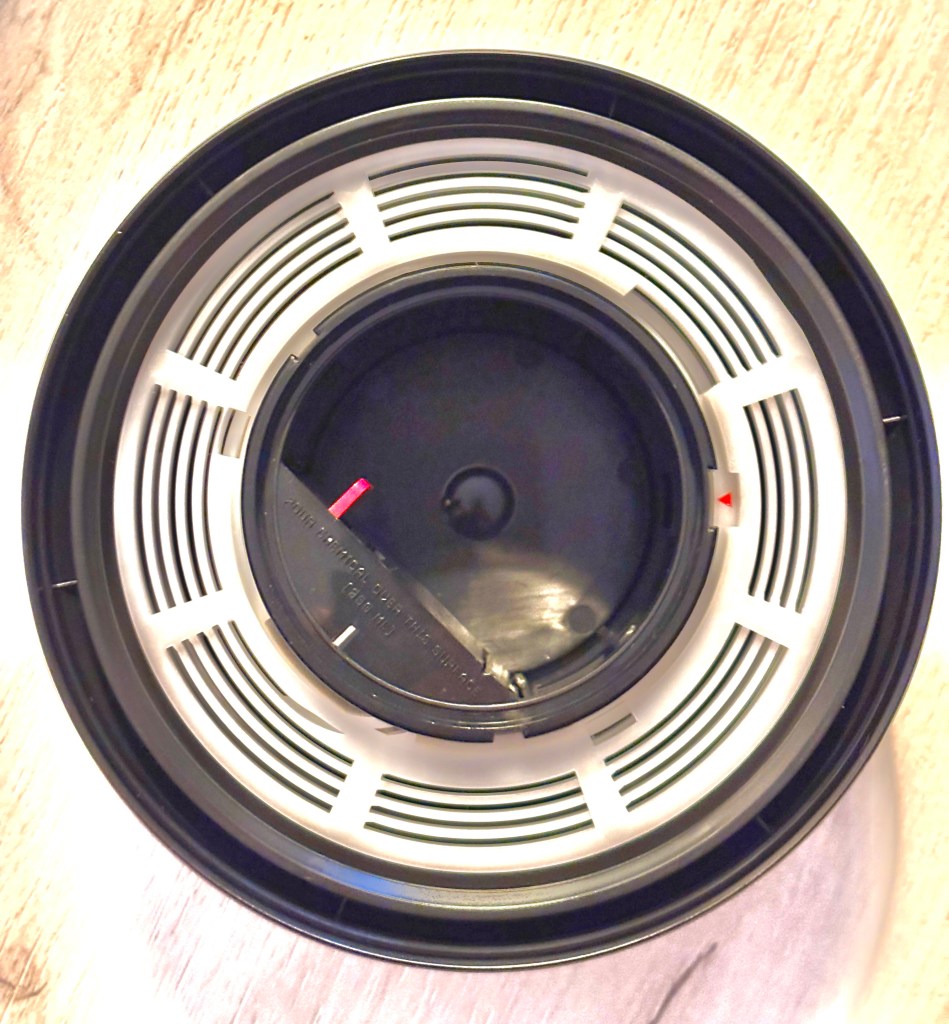
This is Lomo’s solution for daylight 35mm BW development at home. It consists of the development drum, the cartridge feed and the film extractor.
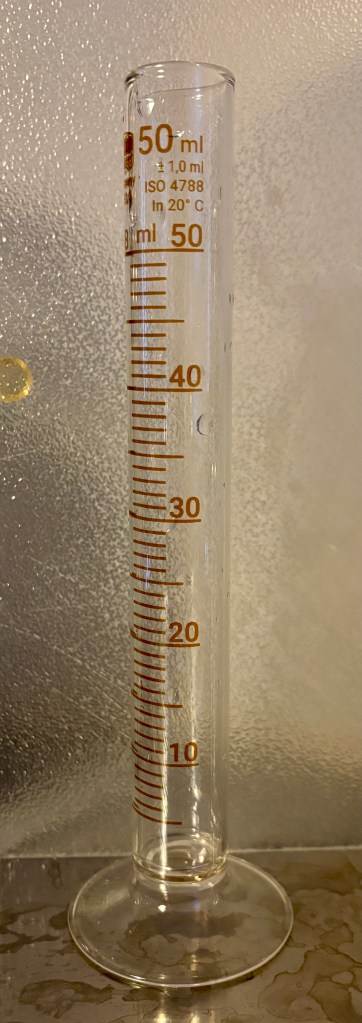
The developer, stopper and fixer need to be procured separately, as are the graduated containers, the thermometer, the distilled water and maybe the wetting agent (isopropyl alcohol).
THE WAY IT WORKS
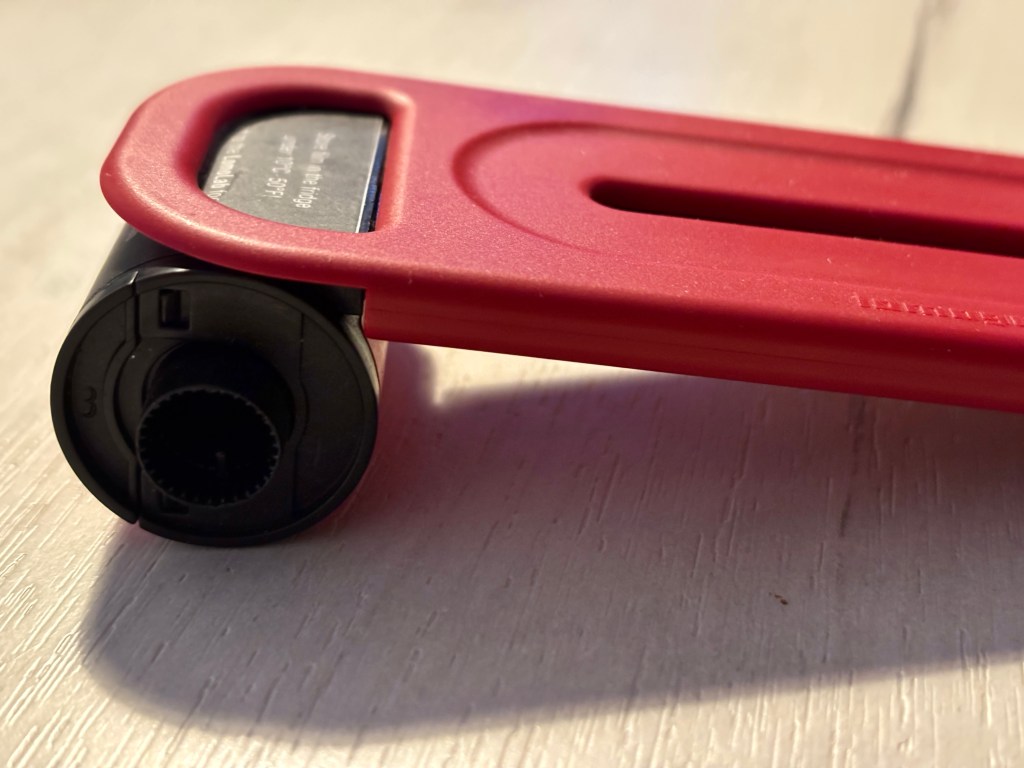
Extract the tip of the exposed film from the cassette using the film extractor. This is easier said than done. It has 2 plastic blades that are supposed to hug the film (one on the top, one on the bottom) when inserted in the cassette and pull it out by friction alone.
After trimming the exposed film at the 8th sprocket hole (apparently this is essential) and cutting the corners to avoid jams, it is inserted into the cartridge feed mechanism so that only a couple of mm come out of the other side.
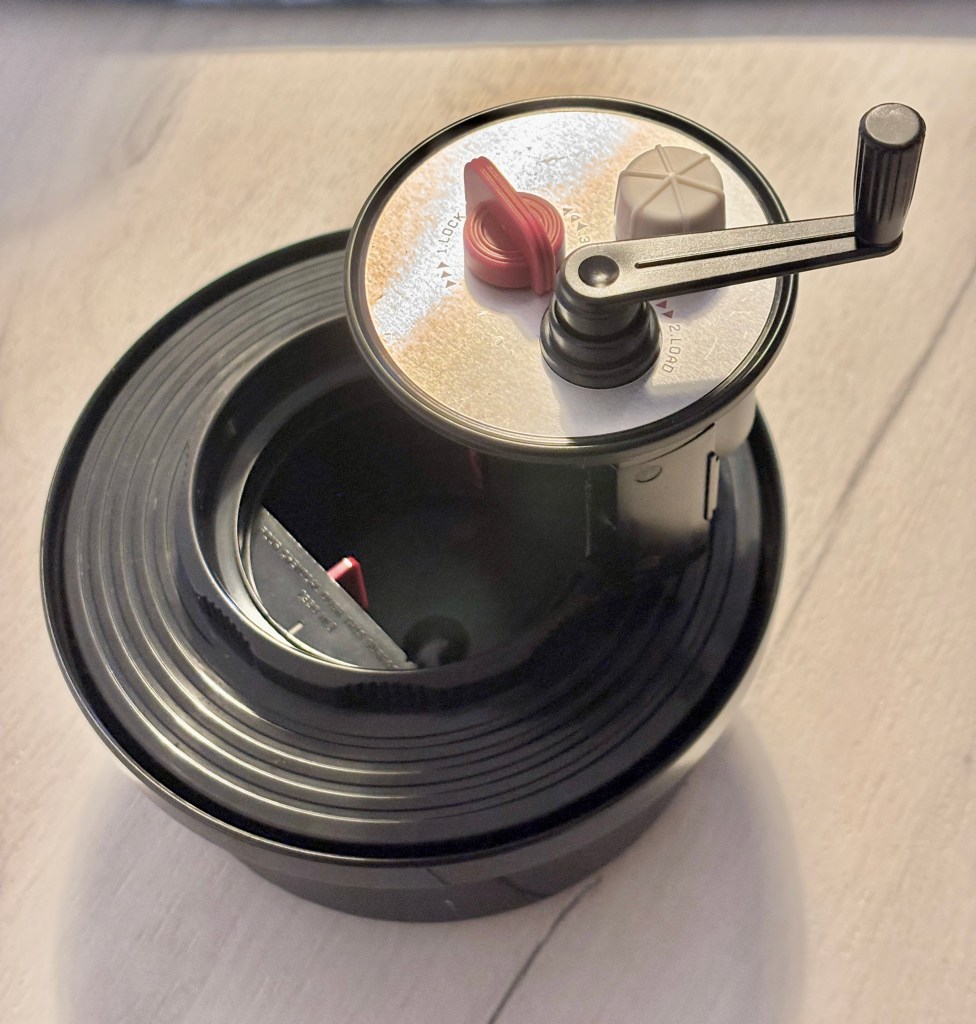
The mechanism is then inserted into the development drum that holds the cylindrical roll on which the film will be transferred to. This is done by turning a manivelle. Thin films will be ripped. The mechanism is plastic and jams will result in the sprockets tearing through the holes in the film. Caution and patience are advised.
After (hopefully) transferring all the film onto the drum cylinder, the feeding mechanism is removed to allow 350ml of the chemicals of your choice.
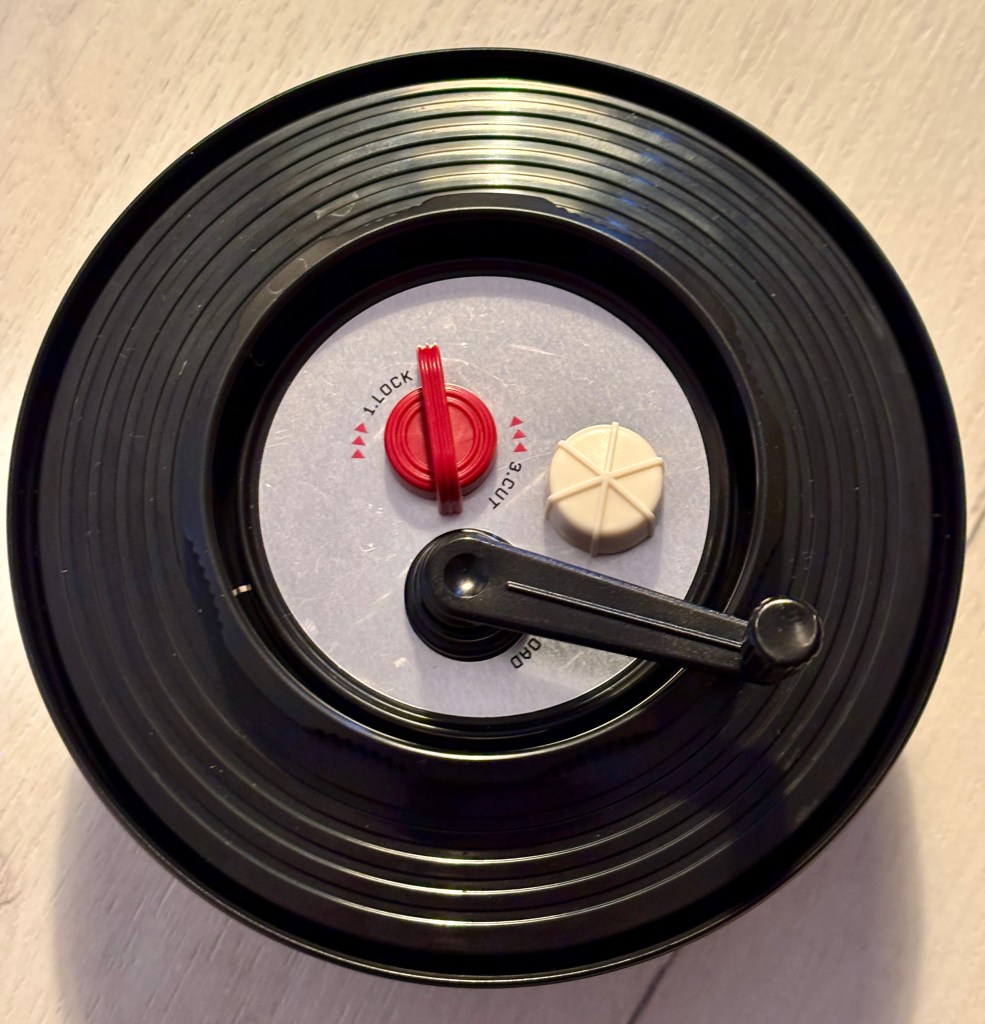
The drum has a metal hinge that secures the lid (it is quite spilly) for the agitation method of developing film. All instructions are printed on the lid, which looks killer.
All downsides considered, this is a brilliant product that makes me very happy. Sure, improvements are possible here and there, but as a whole, this solution is effective, cheap and so much fun.
DEVELOPING
It’s fun. And pretty fast. The film is developed in a solution of developer and water for a set number of minutes at a given temperature. An application told me that Earl Grey ISO 100 needs 35ml of Isofol 3 developer and 315ml of water at 20 C for 6 minutes. You agitate the drum for the first minute, then for 10 seconds each following 5 minutes.
Pour out and replace with stopper (same dilution) for about one minute during which you shake the drum.
Pour out and replace with fixer. 6 minutes or so, same dilution and agitation rules as above.
Then wash the film for 10 minutes or so, with demineralized water, under a running tap, etc. many methods are available.
Then allow the film to dry for a couple of hours in a high-humidity environment (a steamy bathroom). This is apparently important to do (avoids crazy curling maybe?)
========== UPDATE – April 2025
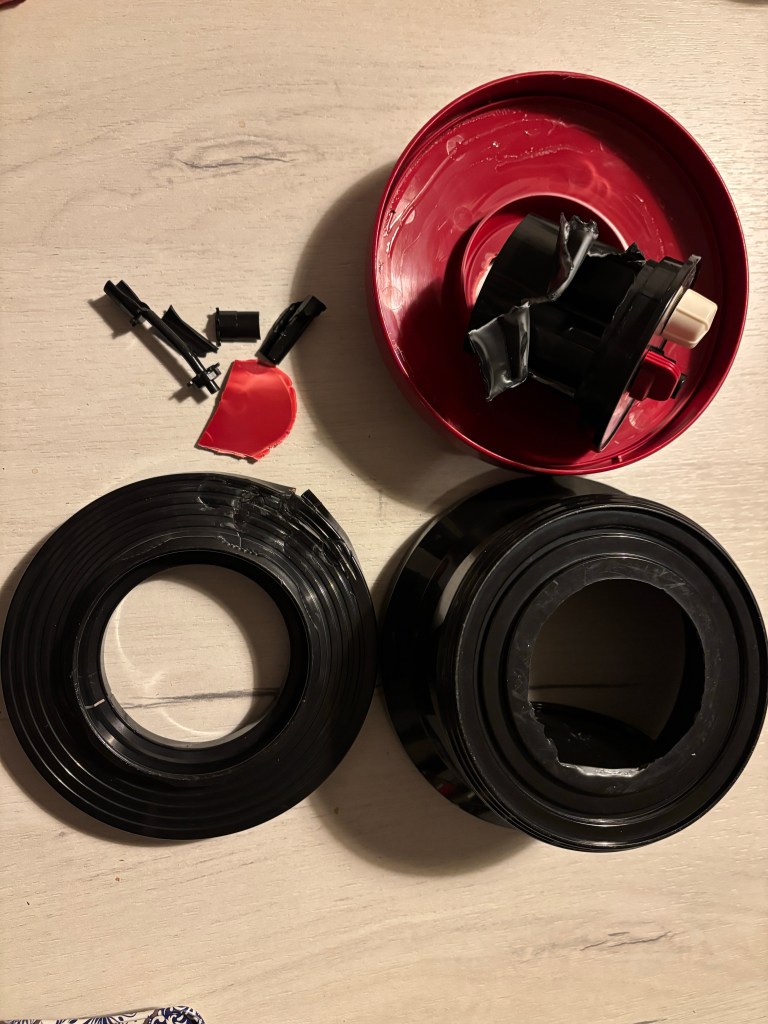
MECHANICAL FAILURE – Film extractor
The device that extracts the film from the cassette and transfers it to the development cylinder in the drum has ceased working: I believe the mechanism has been totally fucked by low-quality film (Lomo and Svema) that either broke when the sprokets tried to force it out of the capsule or when the blade failed to cut it properly and needed to be forced out. One cannot combine plastic (the Daylight develpment tank) with more shady plastic (Lomo films in recycled canisters), for fuckups shall arive.
It now works on the condition that there is absolutely no resistance when extracting the film, otherwise a clutch-kinda mechanism kicks in and the crank will turn on itself in a most useless manner. The risk is to extract only half of the film and lose many shots. Which is crap.
Contacted Lomo and am waiting for a replacement, or for them to sell me the part, or if all else fails I will buy another tank (or maybe two, since it’s prone to breaking). As suggested to Lomo, a premium, metal version would be ideal, especially if it would take 120mm film as well (this may not be possible because of that paper stuck to the film – but any problem has an engineer to defeat it).
=============
UPDATE – May 2025
CATASTROPHIC FAILURE – Replacement by Lomo
Upon inquiring whether the cartridge can be bought separately I was instructed to « smash it with a hammer and send us proof » – which I did, and Lomo replaced the whole thing. R-E-S-T-E-C-P-A.
Catastrophic failure due to encounter with a hammer
A word regarding the materials used: while the mechanical failure was due to the parts being made out of plastic, upon trying to destroy it I found that the plastic used is not only particularly sturdy, but very elastic. I am impressed.
This is Lomo’s solution for digitalising negatives at home (as a natural companion to the Daylight development tank).
It consists of a platform on which the light source is placed together with the film advance mechanism, and of a stand on which the phone is attached. It is powered by mico-usb or 2 AA batteries.
The film advance mechanism is suitable for 35mm film and is sufficiently long and wide to show the full negative generated by the SprocketRocket (including the sprockets).
Scanning 120 film or wider 35mm negatives (such as the ones produced by the Dolphin Spinner 360°) requires separate accessories: the scanning masks sols separately (for 35mm and 120mm). I have a separate light source for these instances (light is brighter and cleaner, but barely so for a significantly higher price).
These masks are very well crafted with an ingenious system that allows to secure the negative and keep it nice and flat. First insert the negative in the plastic casing and place the metal plate underneath:
Secure the film by placing the plastic bit over the film; it will stay in place due to magnets:
Remove the metal plate and the plastic holder to expose the negative and place over your light source:
One may remove the film advance lever and insert the film directly on top of the light source (by removing the light diffuser) – a bit ghetto and you may scartch your negative, but it works if you need to scan and have no additional masks.
The limiting factor is your phone – sensor size, minimal focus distance, etc. Tried to replace the phone with a mirrorless APS-C sensor but results were inferior.
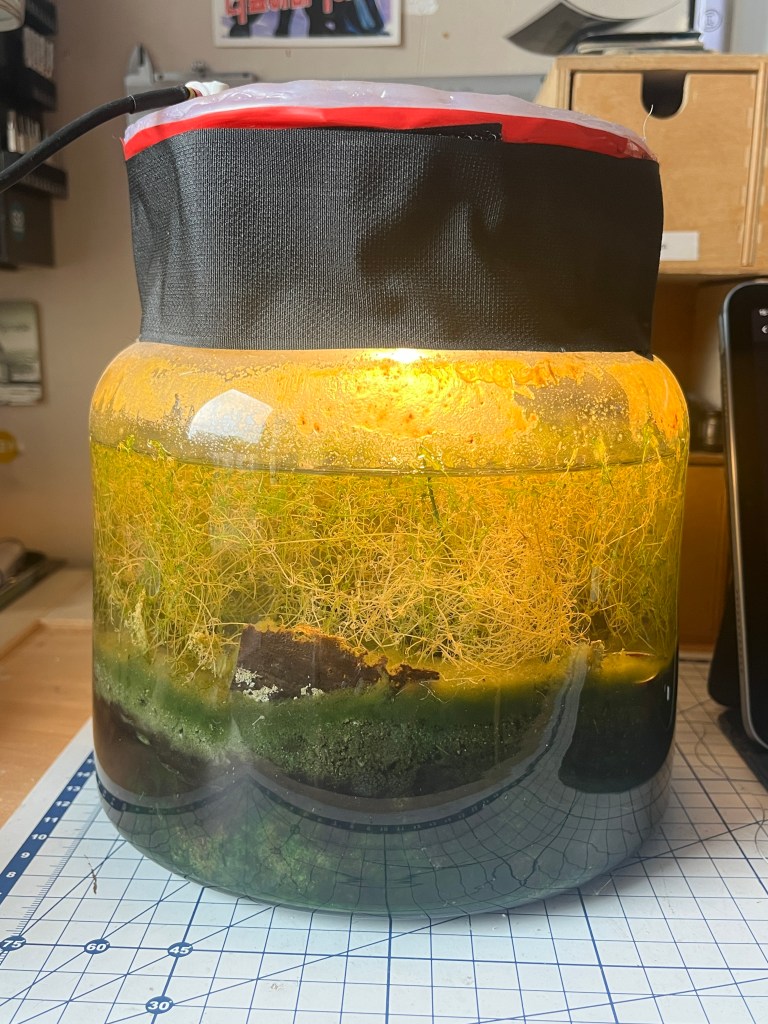
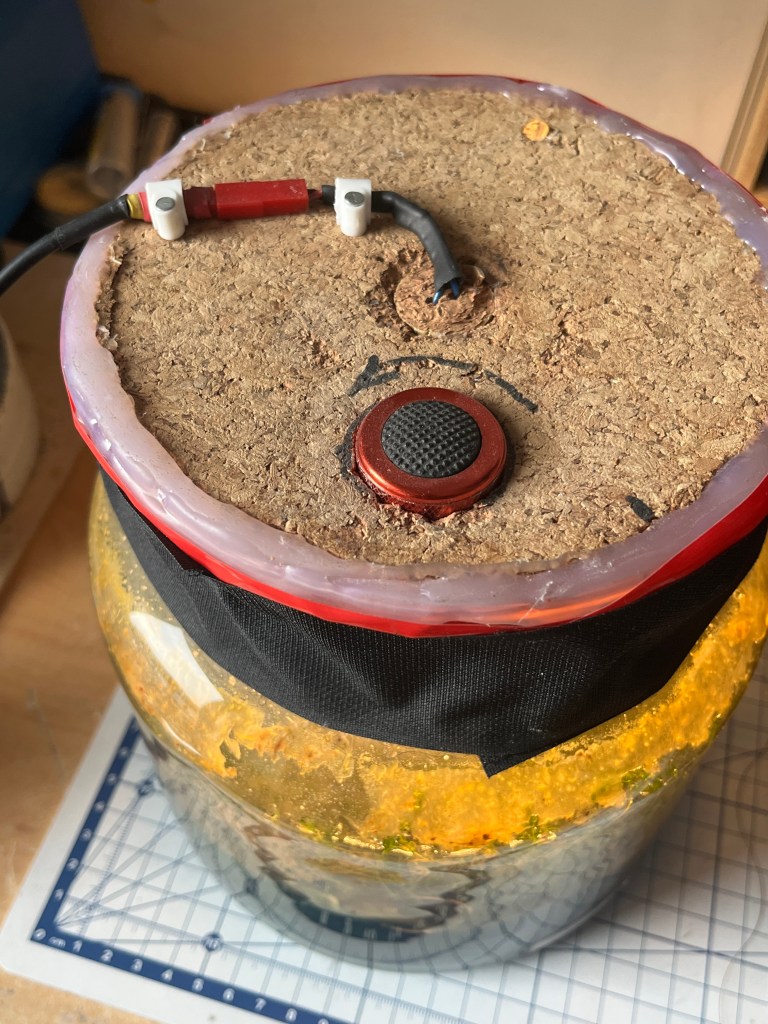
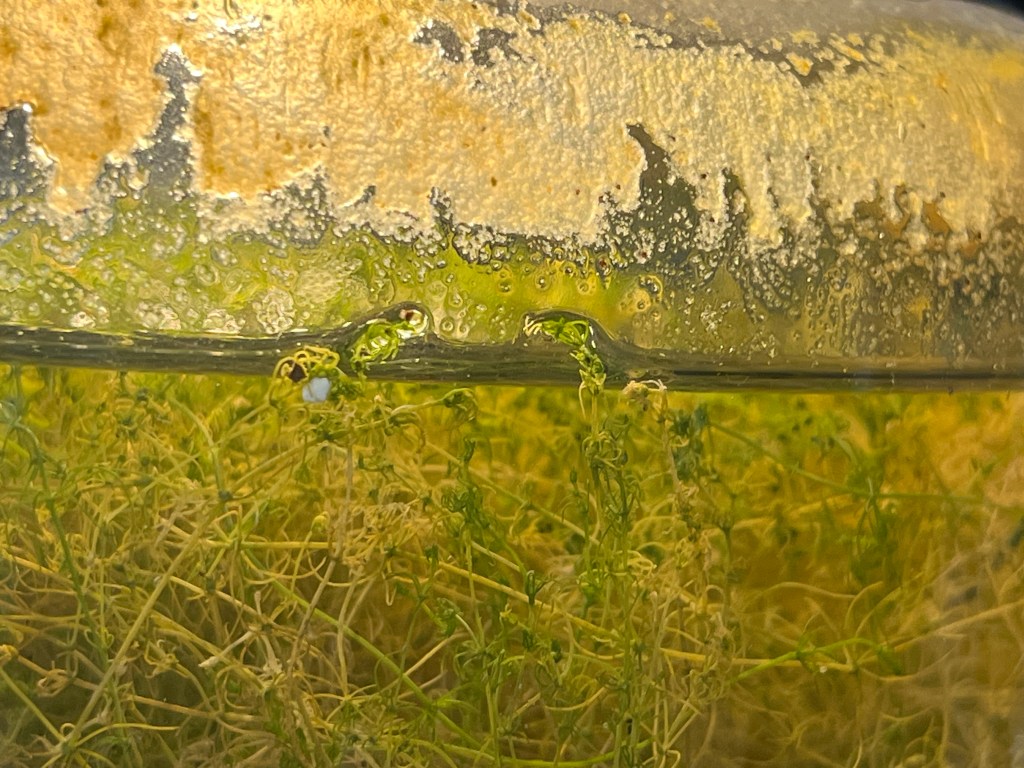
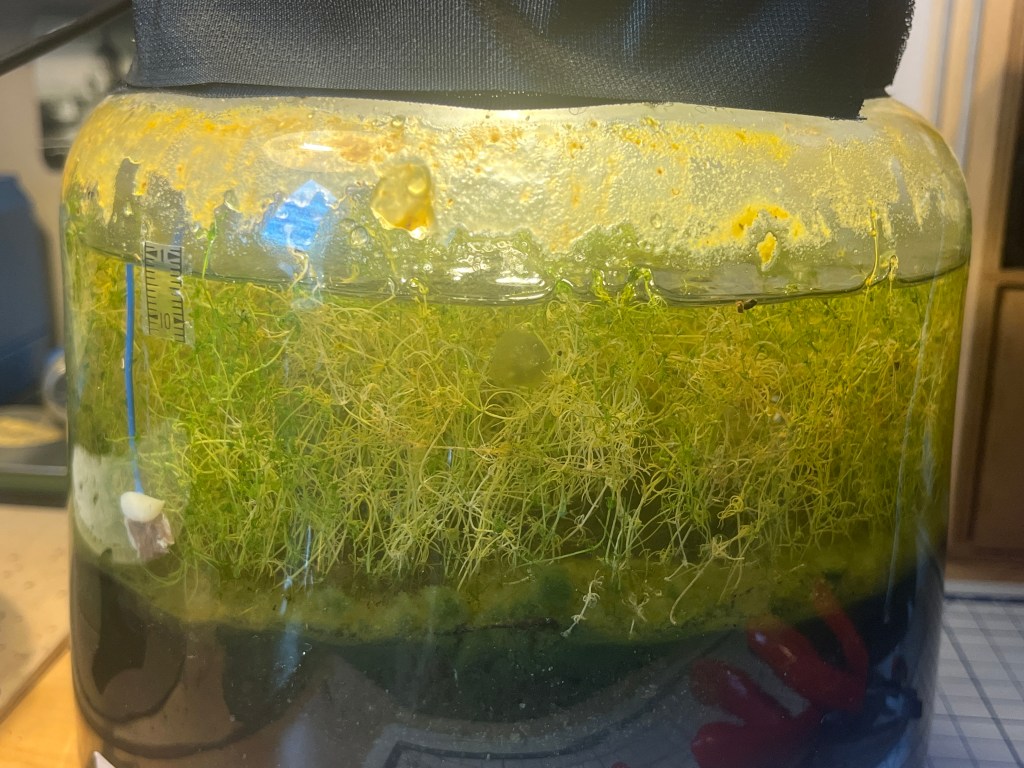
The Swamp was set-up in the autumn of 2020. This is year three.
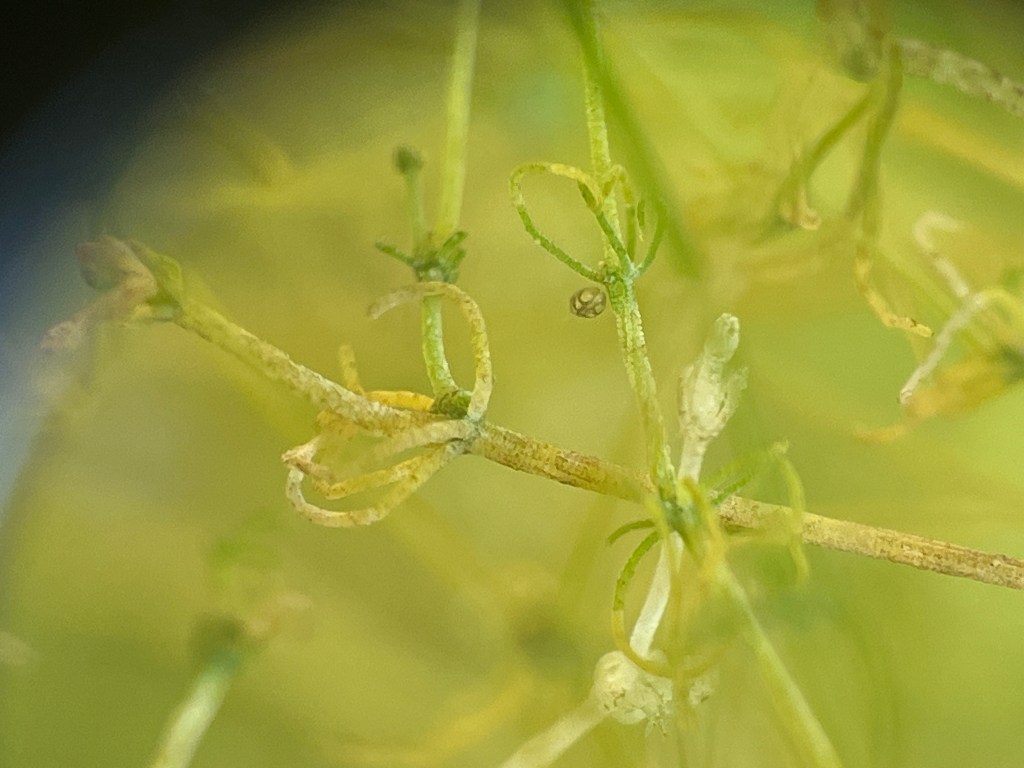
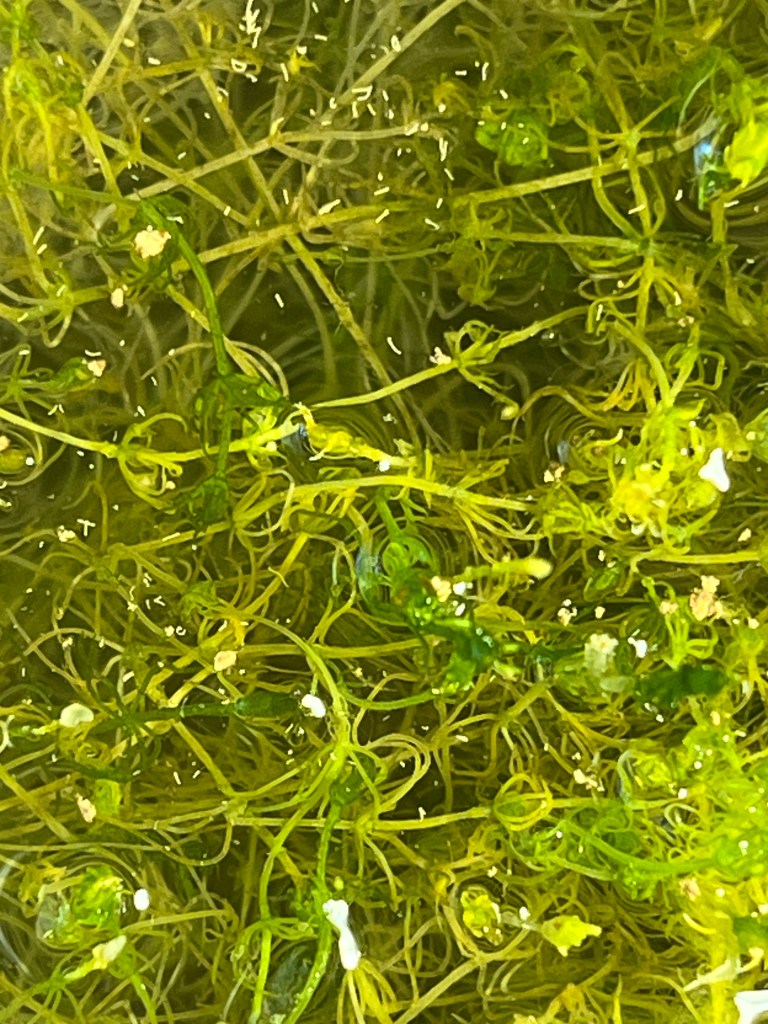
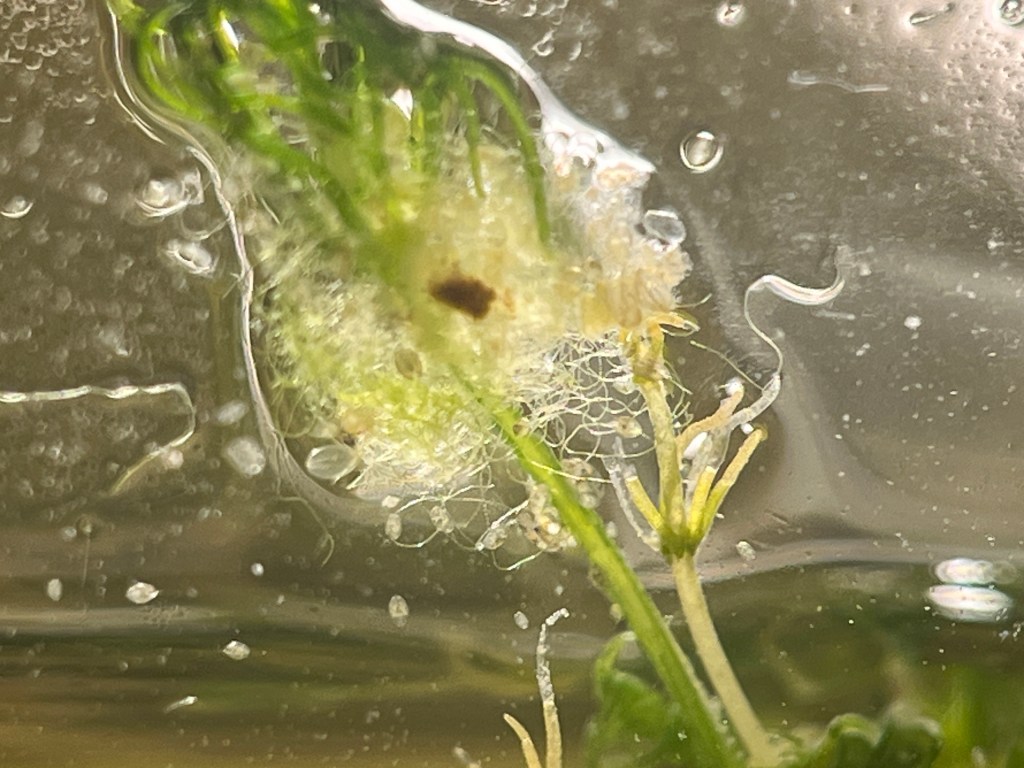
I. General visual inspection
The jar is closed and exchanges with the exterior are minimal. I open it to collect samples and bait the inhabitants with food when I assess their situation.
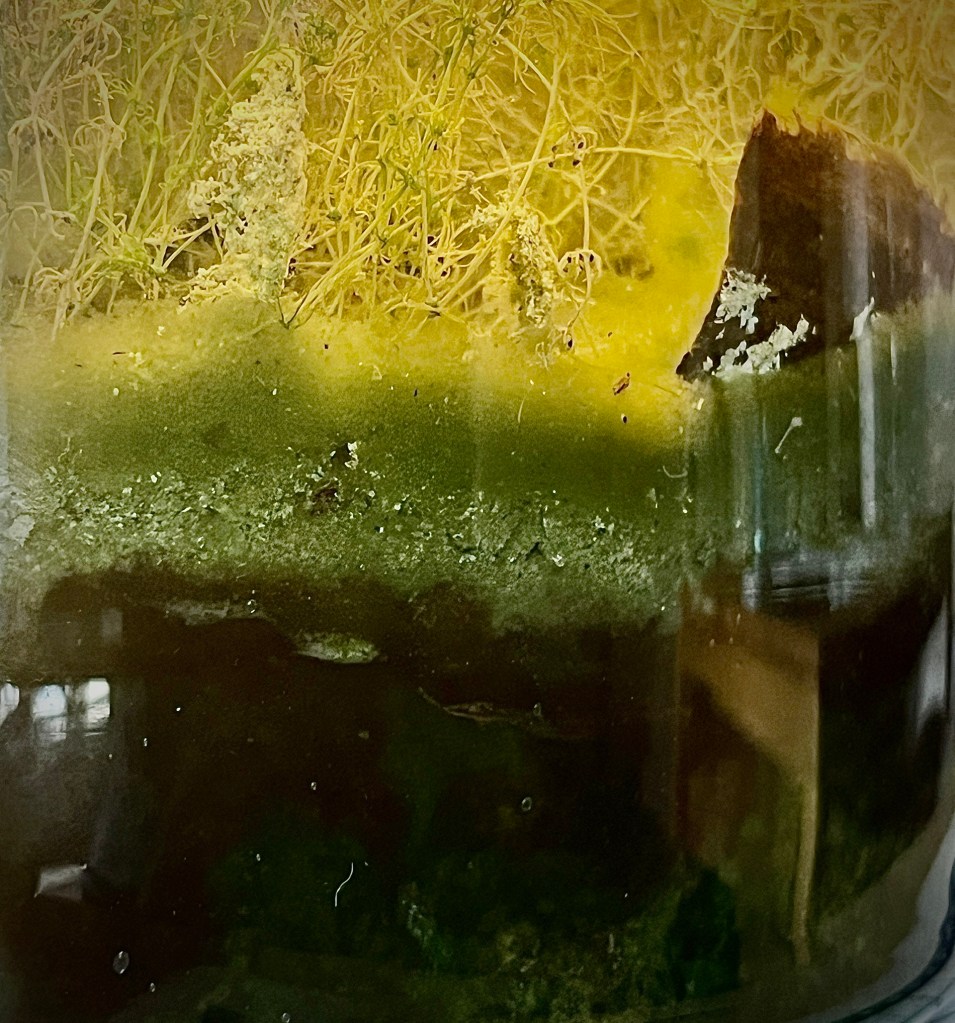
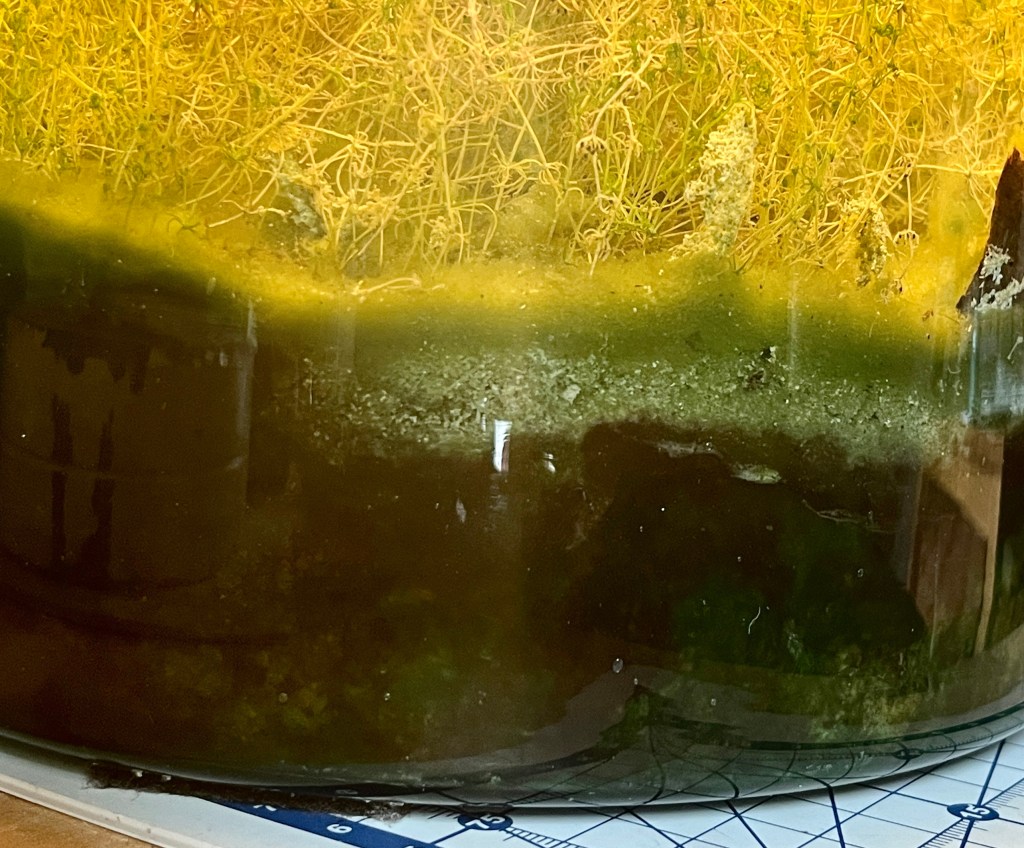
The jar has been completely filled with some sort of algae / water weed that seems to be thriving in almost constant light and steady 22-24°C temperatures. It fills the whole volume of water.
The bottom is divided in three clearly defined strata: the loose, top layer is made out of green particles that I believe to be waste from ostracods, the middle layer is of a lighter colour and is made out of larger, harder grains, while the dark, bottom layer is where I believe nematodes dwell.
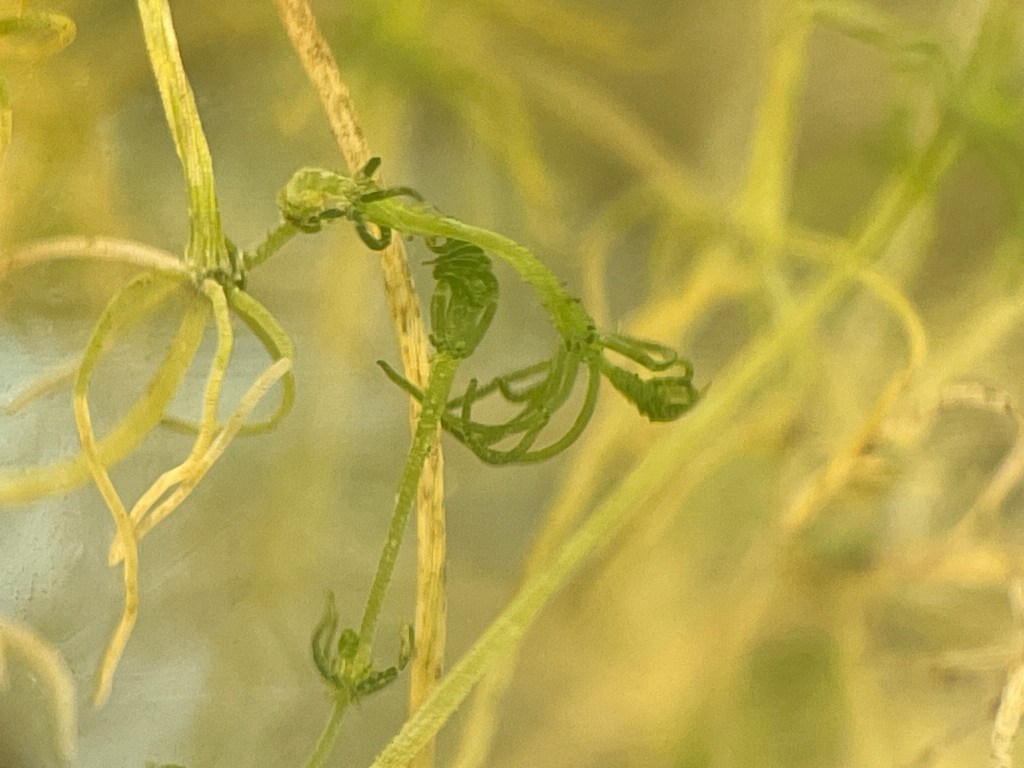
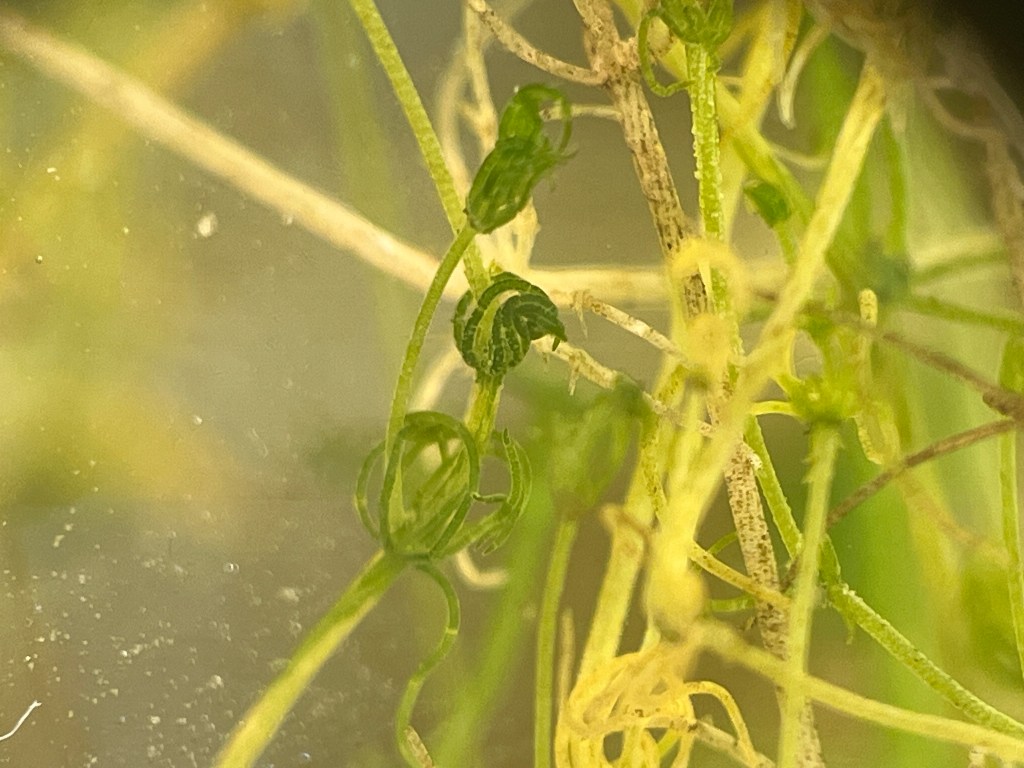
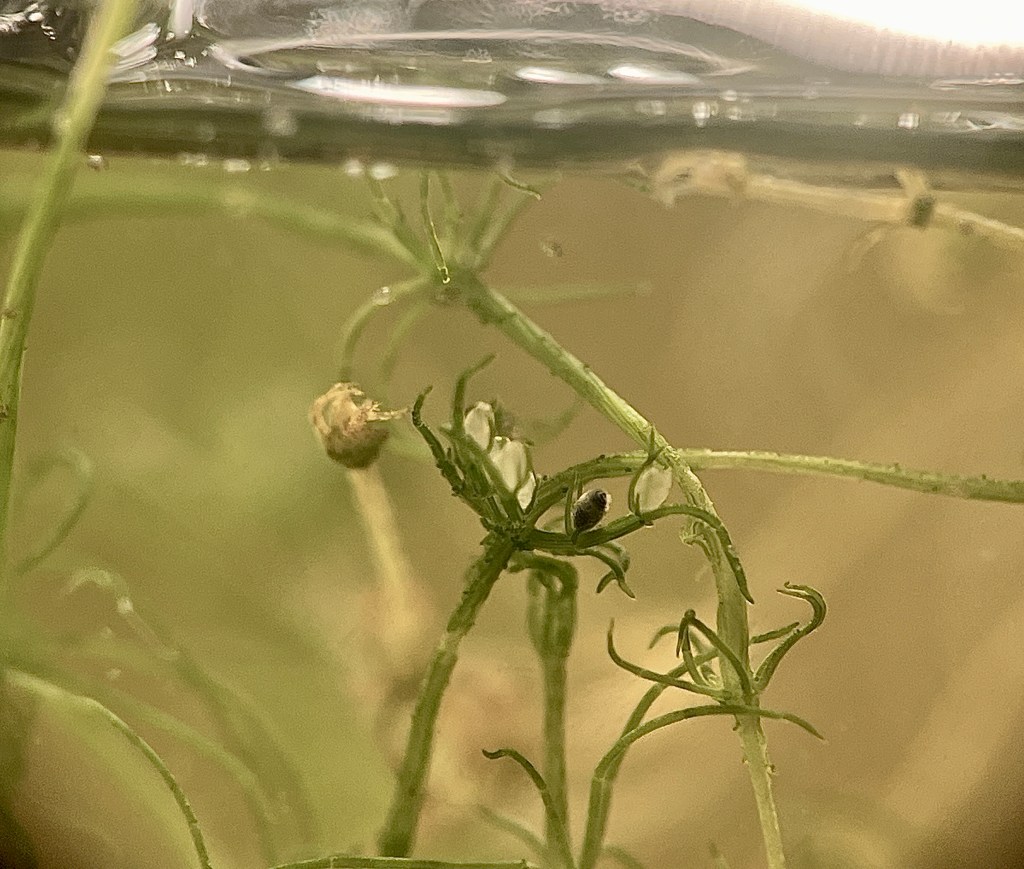
Looking through a magnifying glass (a 30mm 1.4 objective) I saw the ever-present uncontested masters of the swamp – the spotted ostracods – as well as those reddish-brown bugs that I’d seen before and resemble ticks. I was glad to see cyclops buzzing around and there are also nematodes.
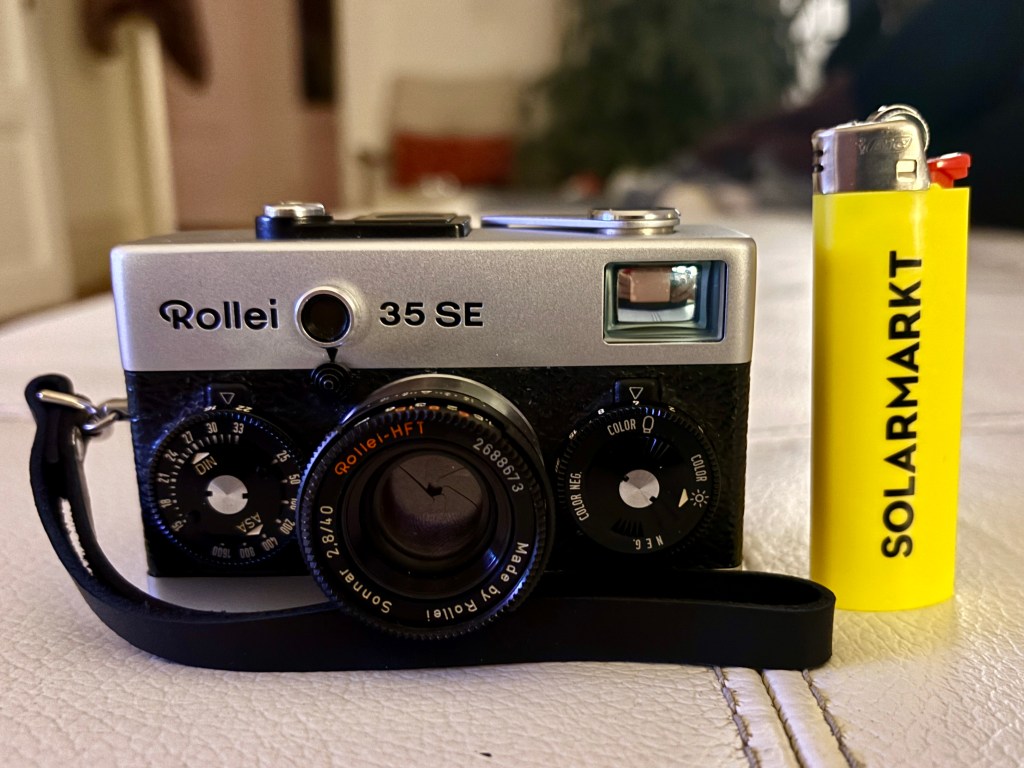
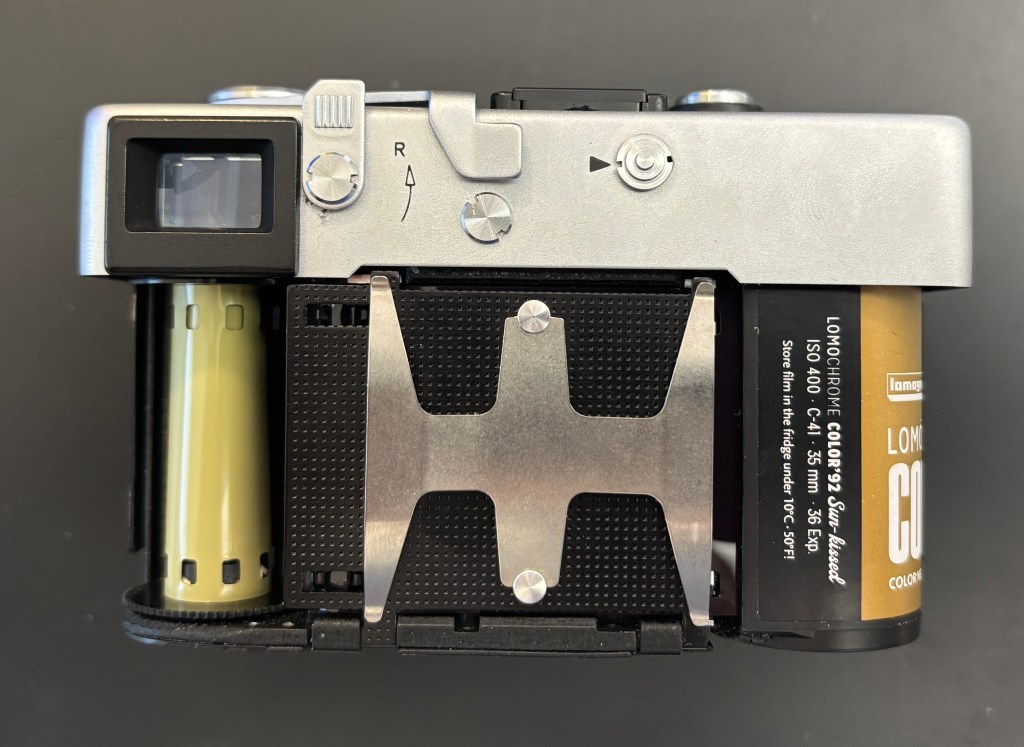
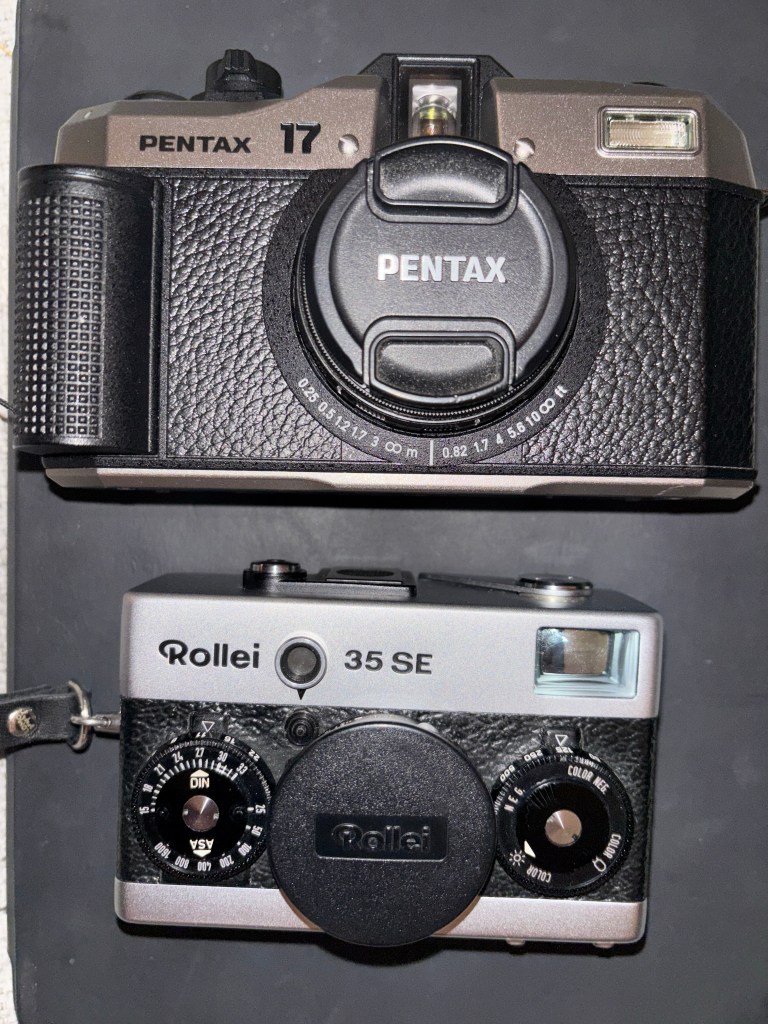
This particular version seems to have been produced in 1980 and is new. Brand new. Never used. No scratches, no dents, no fungus – pristine 42 year-old camera. Serviced last week before buying it.
I had also ordered the recent version (april 2024) but the box came unsealed and the camera was used (scratches). So fuck that. It’s alo larger and feels cheap, as much more plastic was used. No idea if it’s any good as I haven’t tried it.
This is indeed a tiny machine, heavy with sturdy metal and splendid build quality. The Pentax 17 – which I like – feels bulky and cheap (light).
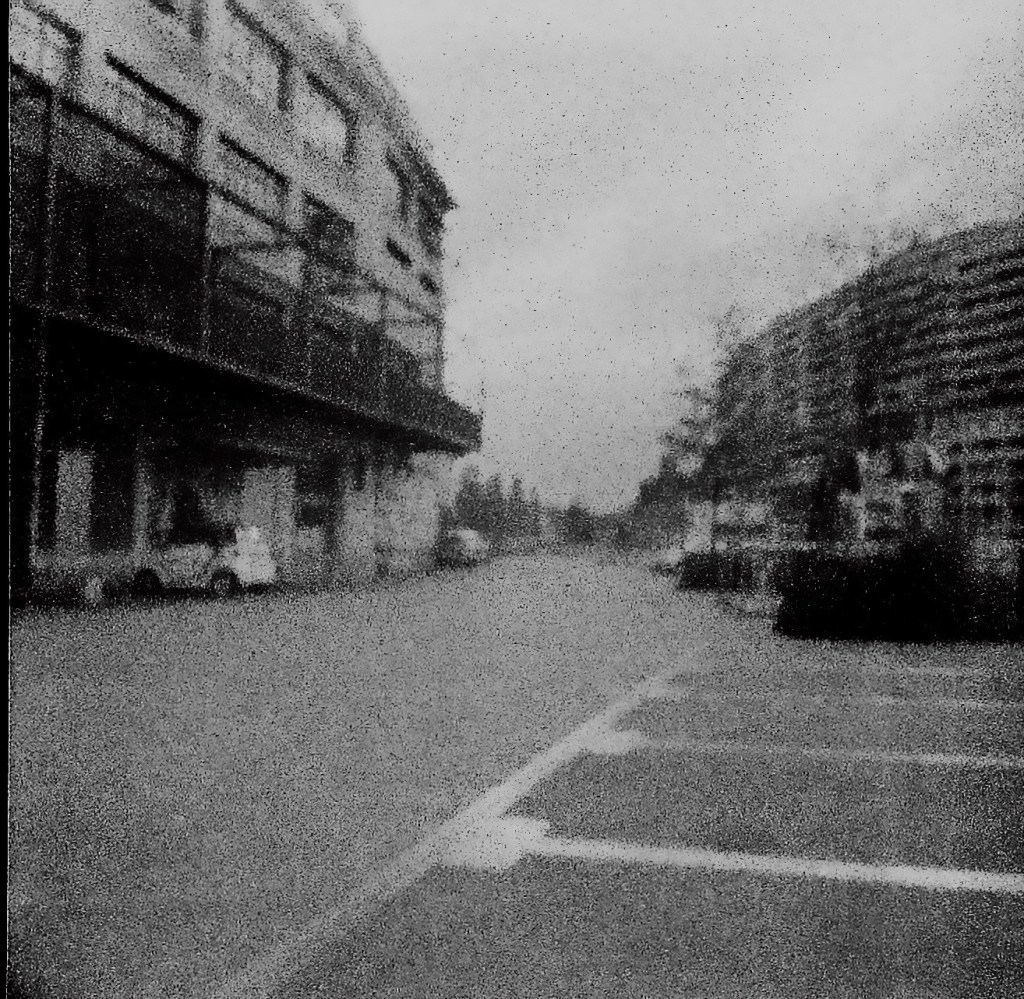
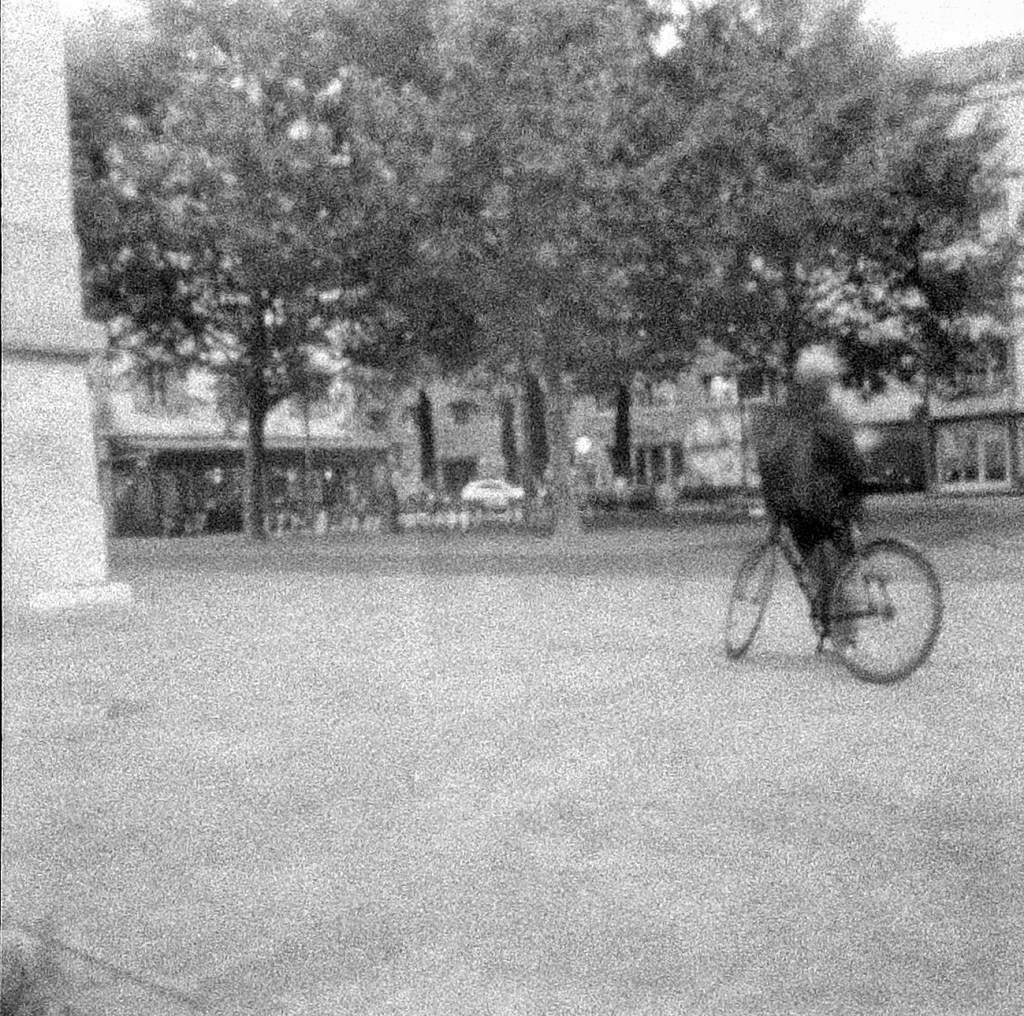
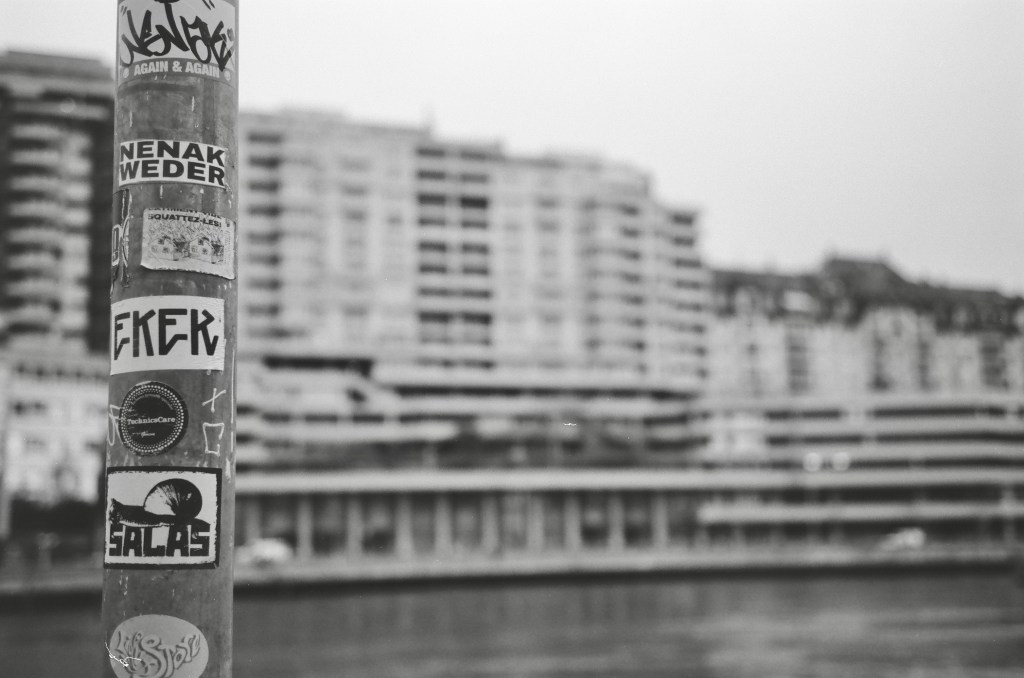
Tested the bokeh on a particularly grey afternoon, wide open at 2.8. Results are very good:
The same shot taken with the Pentax 17 and the Washi Z 400 and with the Rollei 35 SE and the Fuji Neopan Acros II 100.